The gay kink community has been quite expanding over the last years and the fetish scene is following that trend. One of the most striking change is the puppy community. It originated from the dog play community, a form of bdsm play where you are not event a slave, a gimp, not even a human being. It allows the player to leave all social codes and free himself. It developped a lot as an easy and efficient way to switch out of reality.
I’ve seen the gearhead scene develop, and I’m super happy that, as I continue my path exploring gear fun, there’s more diversity than ever. I recently looked at group photos from Gearblast 10 years ago versus nowadays. It used to be mostly leather bikers at Gearblast. Nowadays you have bikers, tactical people, firefighters, hazmat guys, sports players, and every combination of those!
Another evolution I’ve seen at events and online is that most new gearheads nowadays explore the puppy universe: they shoot puppy pictures and bring puppy hoods to events.
For me and many other gearheads who don’t say it publicly, a pup hood greatly reduces the strength of the look. As a gearhead, aren’t you after that anonymous, sometimes threatening look? A balaclava, a tactical helmet, a gas mask, or a motorbike helmet really hook me in! And a puppy hood kind of destroys it.
I don’t mind people exploring awesome gear-and-puppy combinations. But I want to stress to newcomers that the puppy hood is not a mandatory item for exploring gear fetish interests!
In my bondage fantazies I wanted for a long time to explore what happens after hours and hours of bondage, maybe even days ? That’s what we call long term bondage.
I have some friends experienced into that and Rotkaepple offered to keep me locked for the whole easter weekend.
There are many ways of organizing the logistics of a long bondage game, I decided to make it pretty extreme to fulfill my fantazy. These are some constraints I put to the game :
The game would last max 72h, up to the warden to set the end time
During the game I should almost not get out of the cell
I would need to be totally isolated from the outside world
The light would be always on in the cell (real mindfuck)
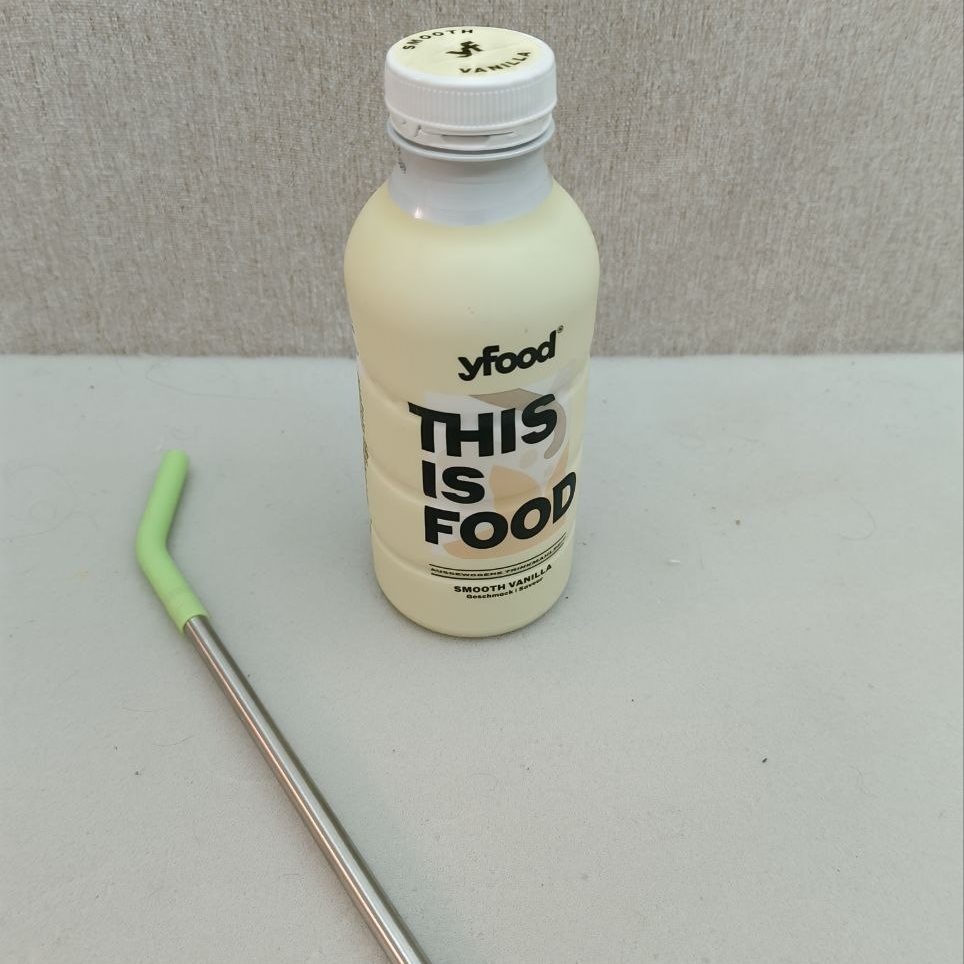
I would only eat liquid meals with a straw (mostly dehumanizing)
Other measures were taken for safety/convenience :
A radio emergency call button was always in my reach
The webcam was almost all the time monitored
Once a day a shower & toilet break was allowed
Diapers were used the rest of the time, so no excuse to leave for a small pee-pee
Food & Drink
As stated before, I had only liquid meals like these to eat, and glasses of water :
Liquid meal with a metal straw
That’s all… let’s start
Day 1
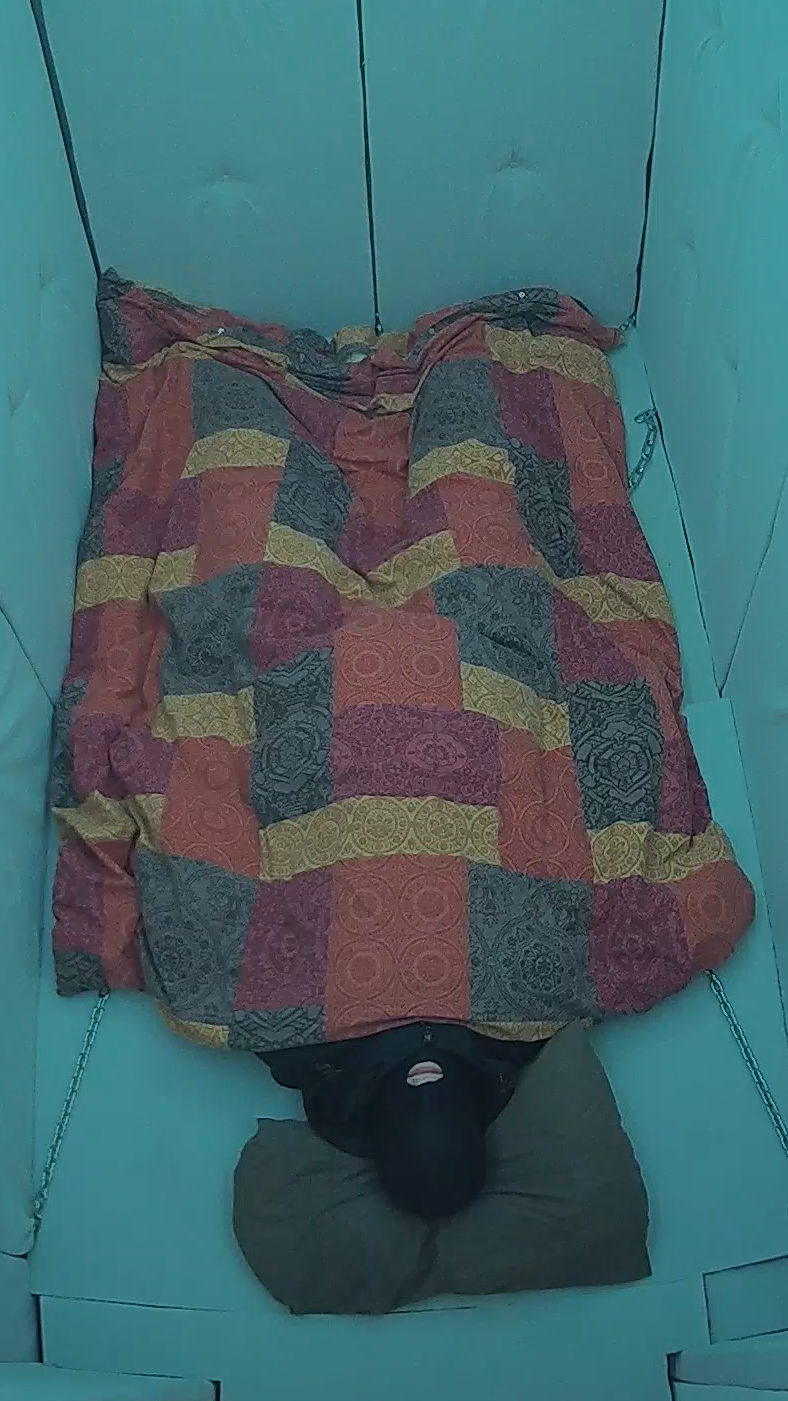
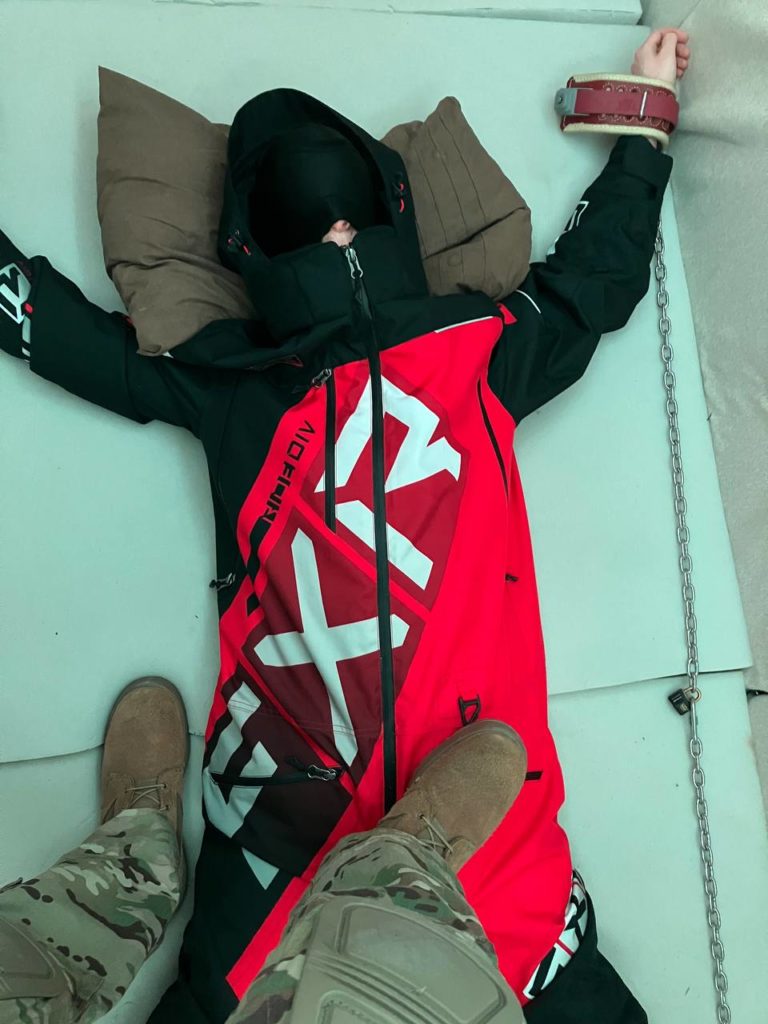
Well, it actually started with a night, at around 23:30 was the beginning. Chained hands and feet to the walls, with a blanket and a hood
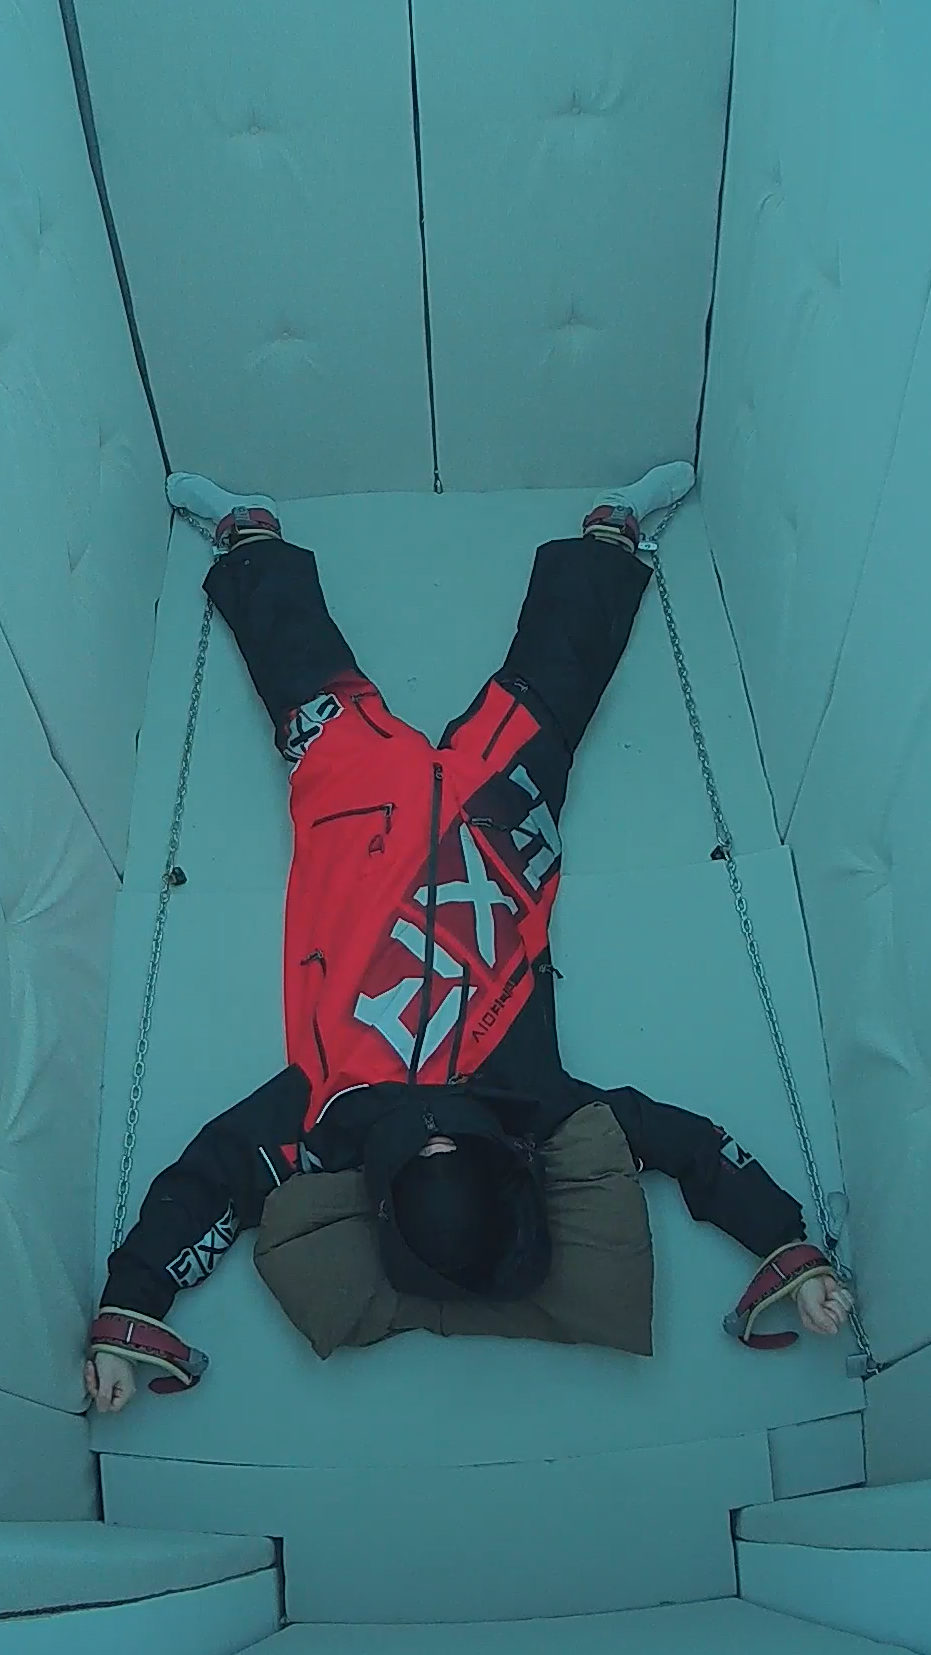
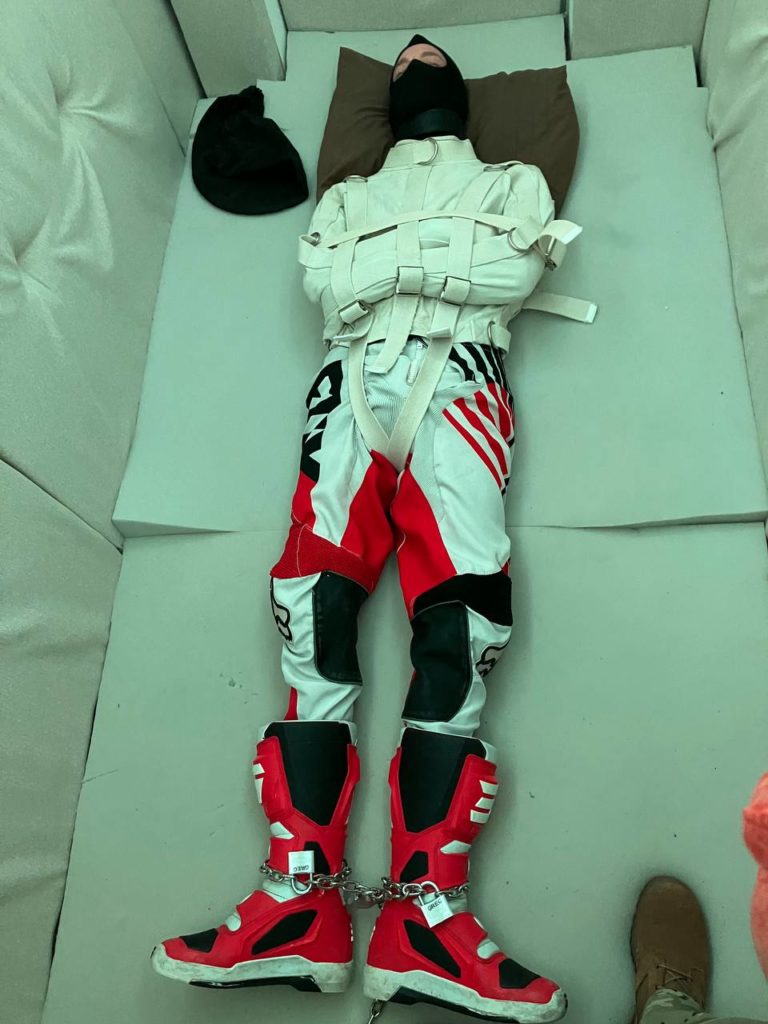
On the morning, at H+10h45 I was spread eagled, fed and left like that for about an hour
At around 12h that day, I was taken out for a shower break.
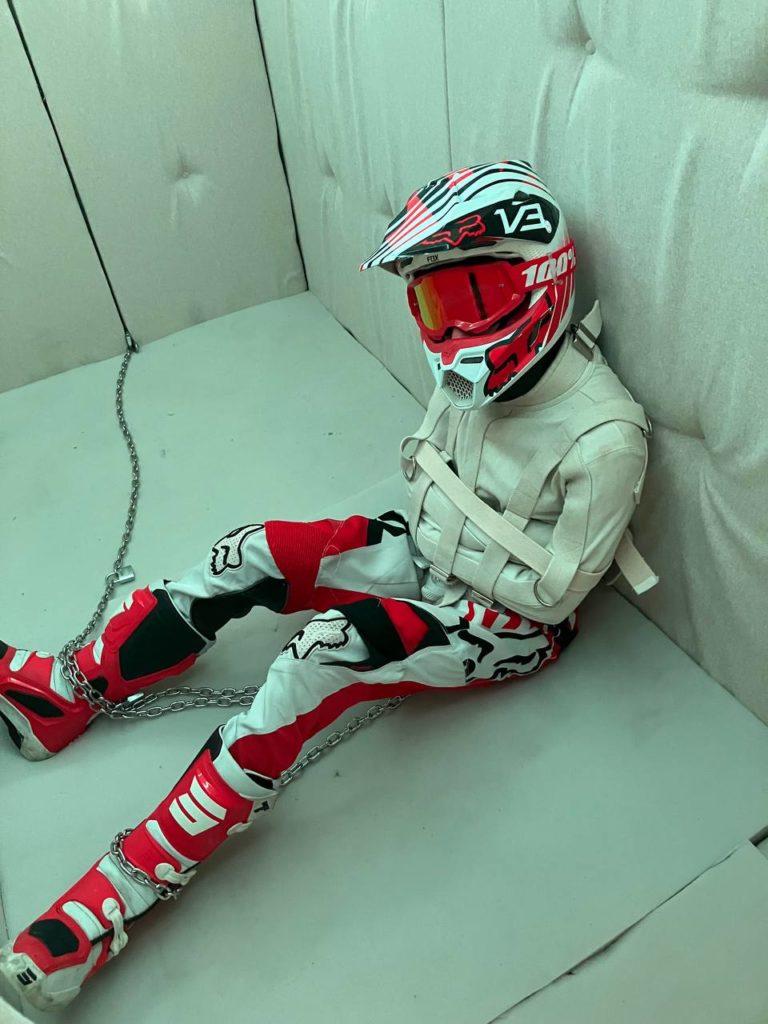
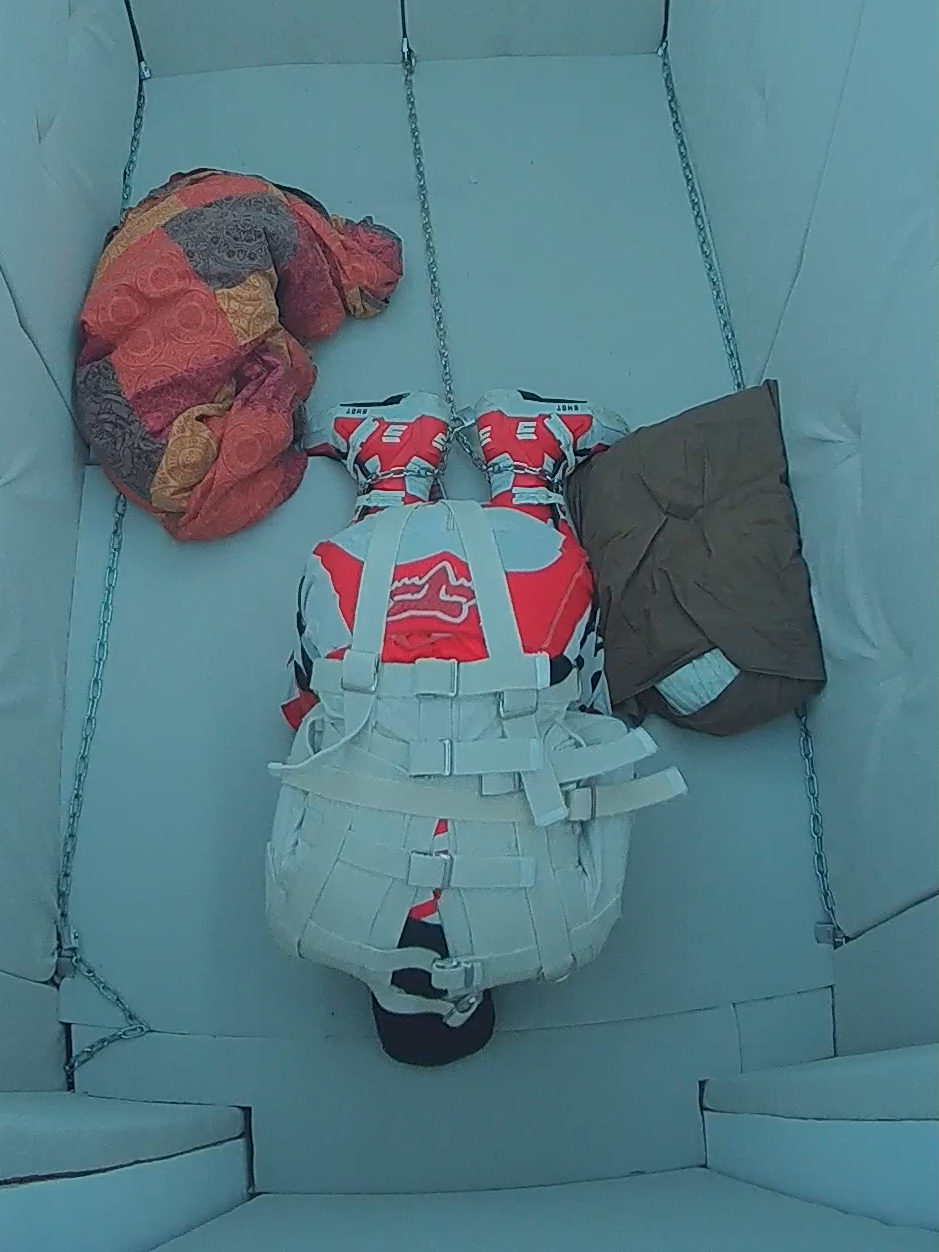
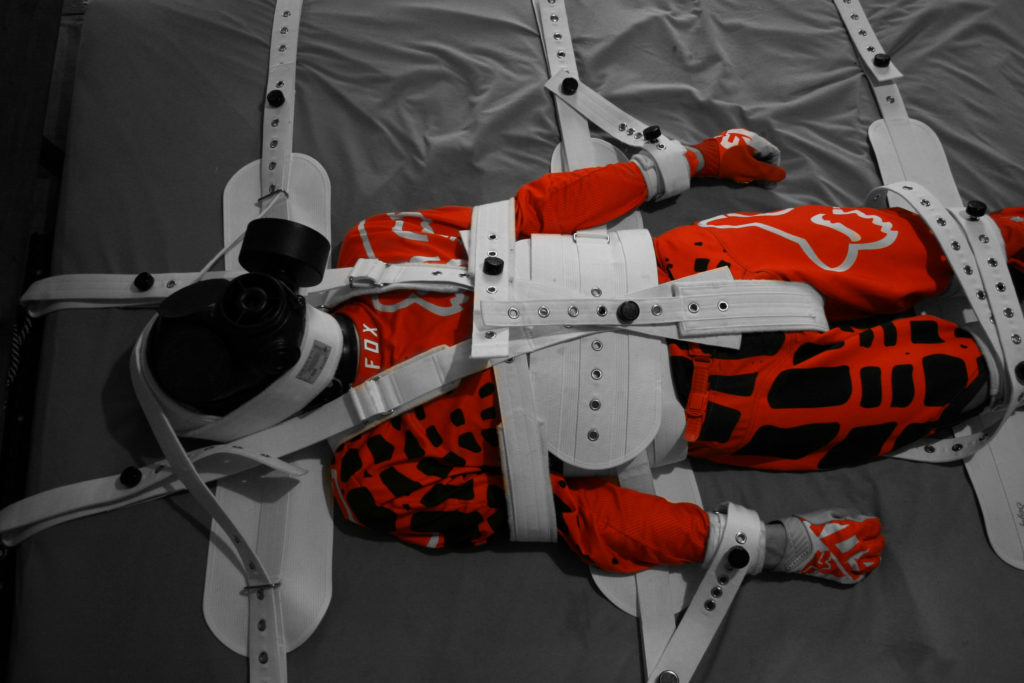
Then back in MX gear + straitjacket and left waiting for 4 hours…
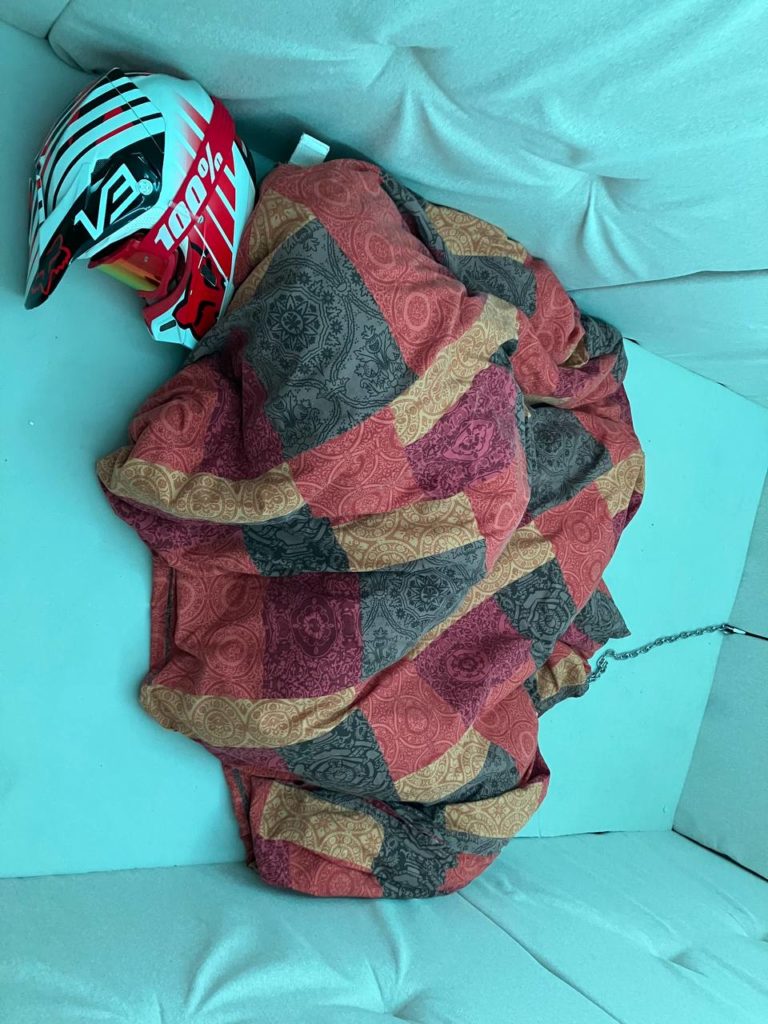
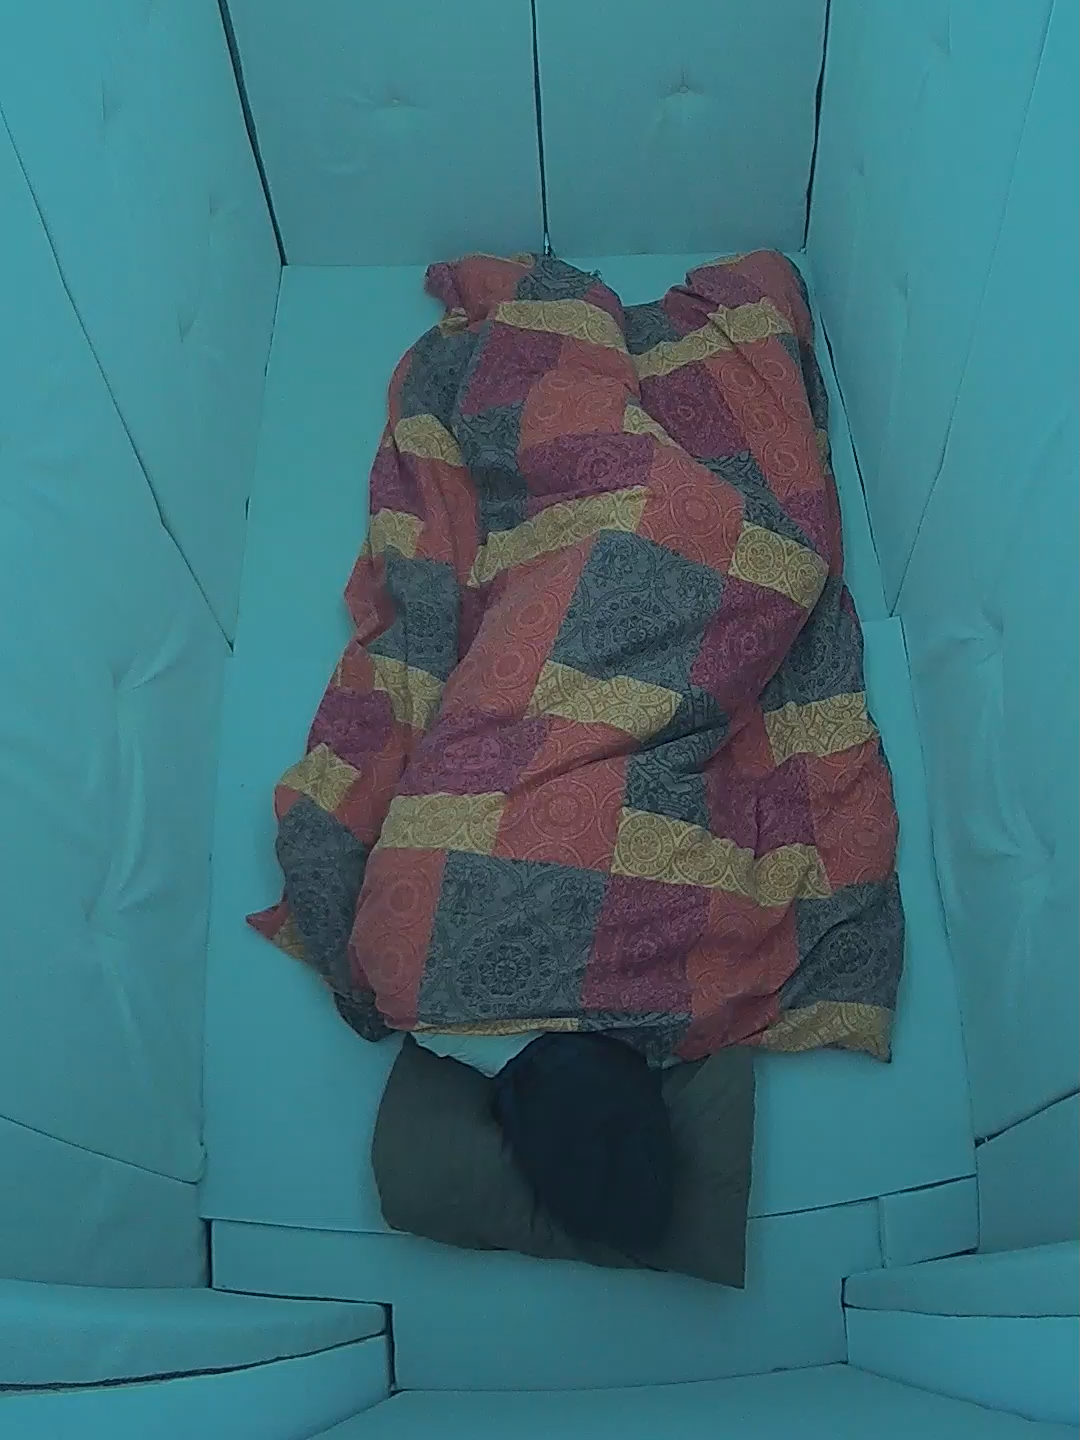
When I was getting cold I was allowed a blanket
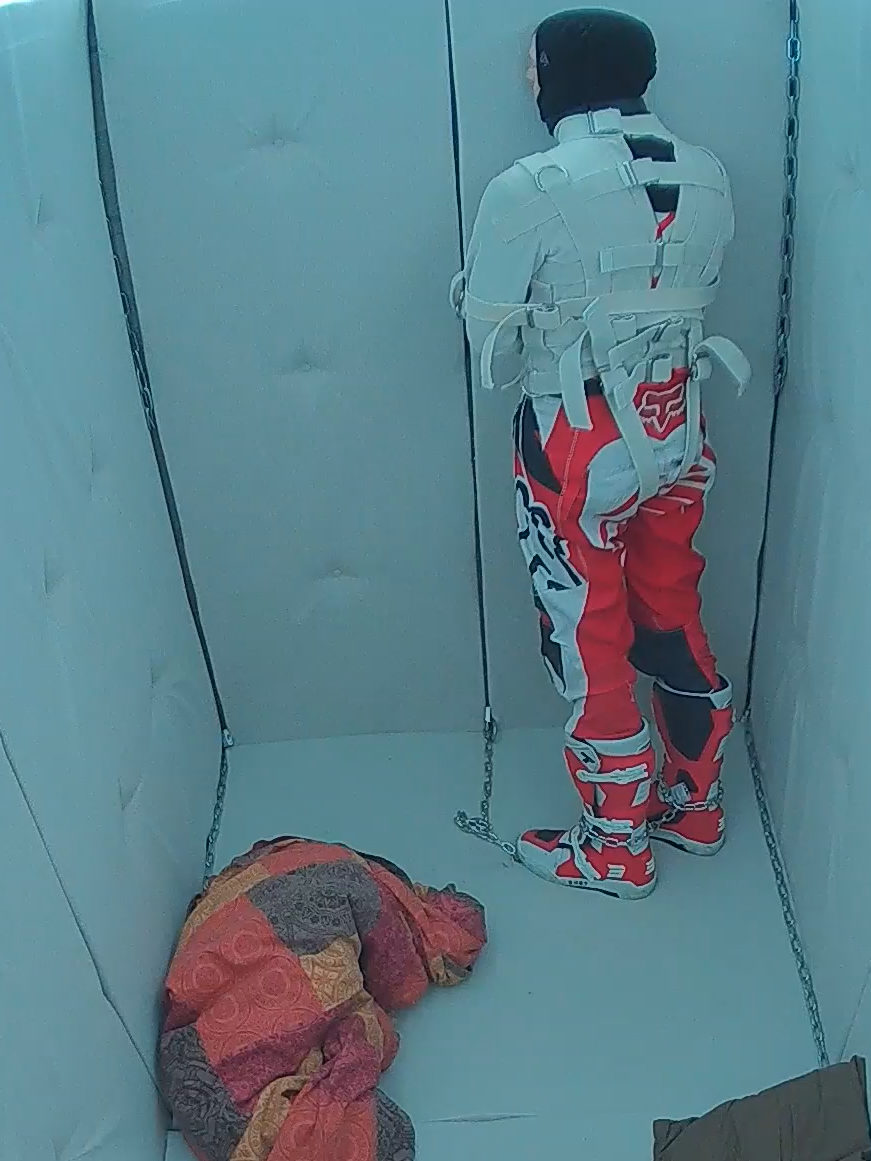
Later in the afternoon, around 16h30, I was chained onto the wall for an hour or so
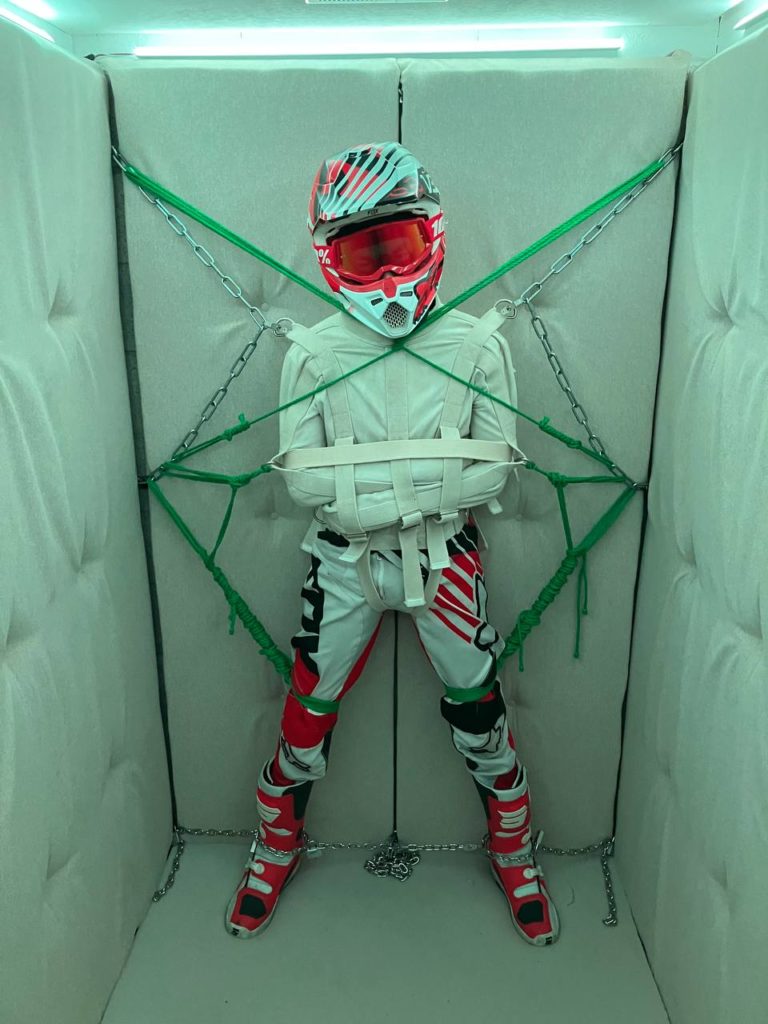
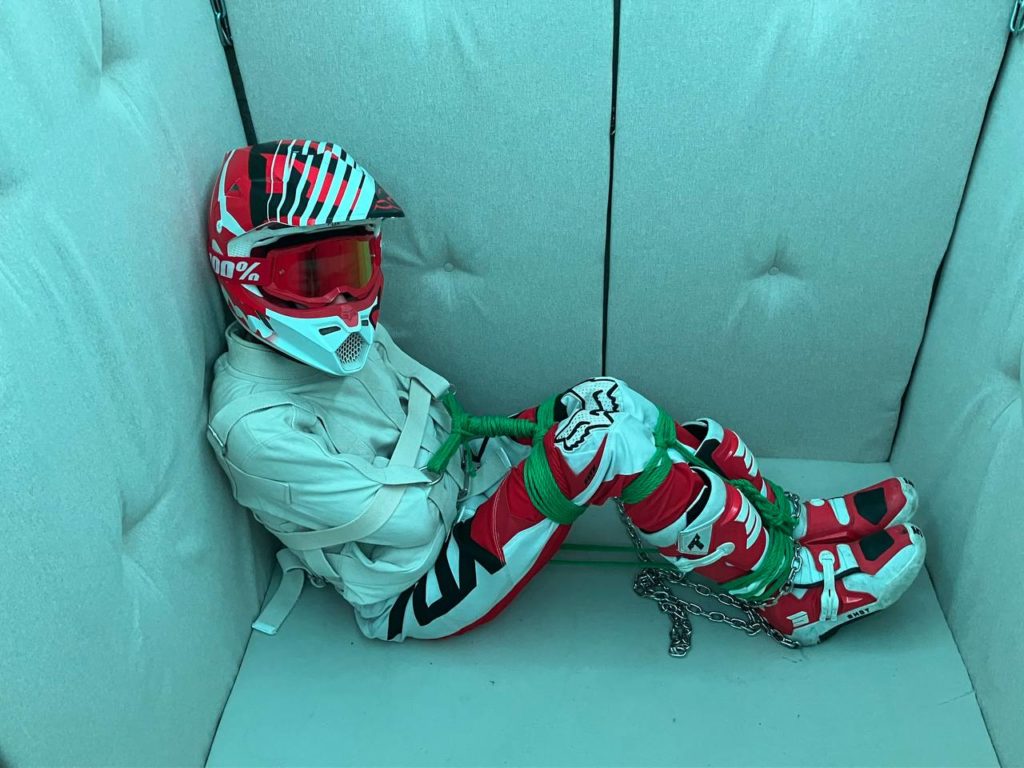
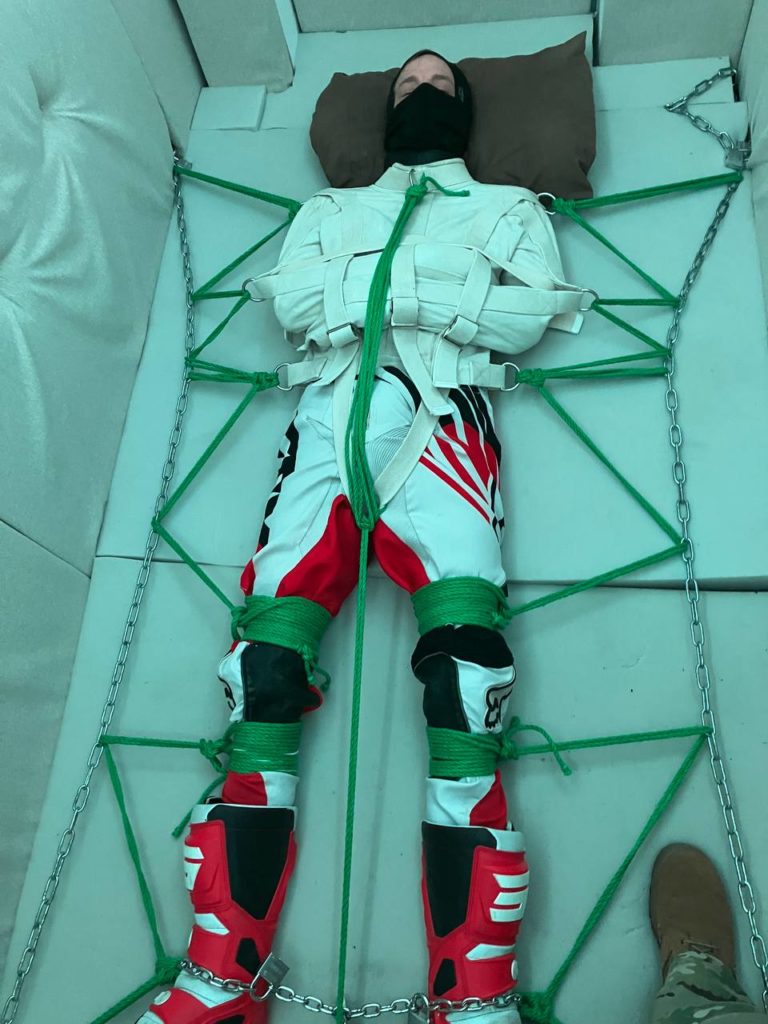
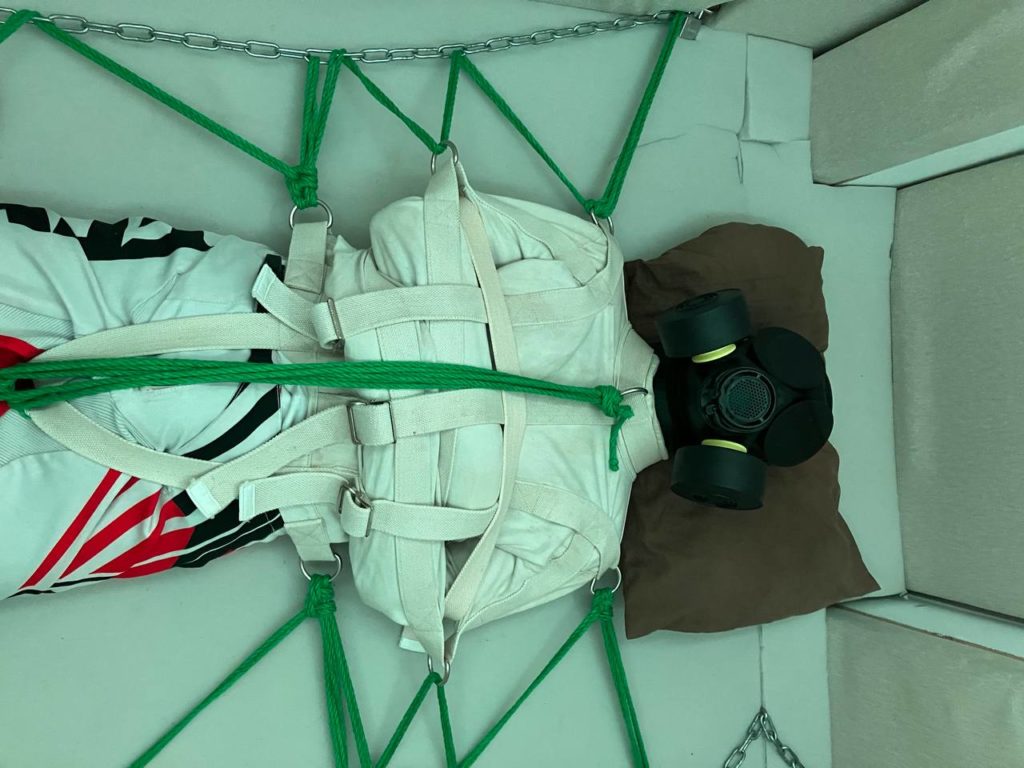
And left waiting again until 20h where I was fed and tighthly packed with ropes for an hour and a half :
After 21h in the game, we did a break, I was transported in my straitjacket on my couch to have a quick chat, see what we can improve. I had not much to say, I was very deep into sub mind at that time… sooo.. it was getting late, back to sleep. I was put back in my cell, still with the straitjacket and a prison capture hood was applied.
How I spent the second night… with lights on
Day 2
That morning, after breakfast, I was left about an hour staring at the wall
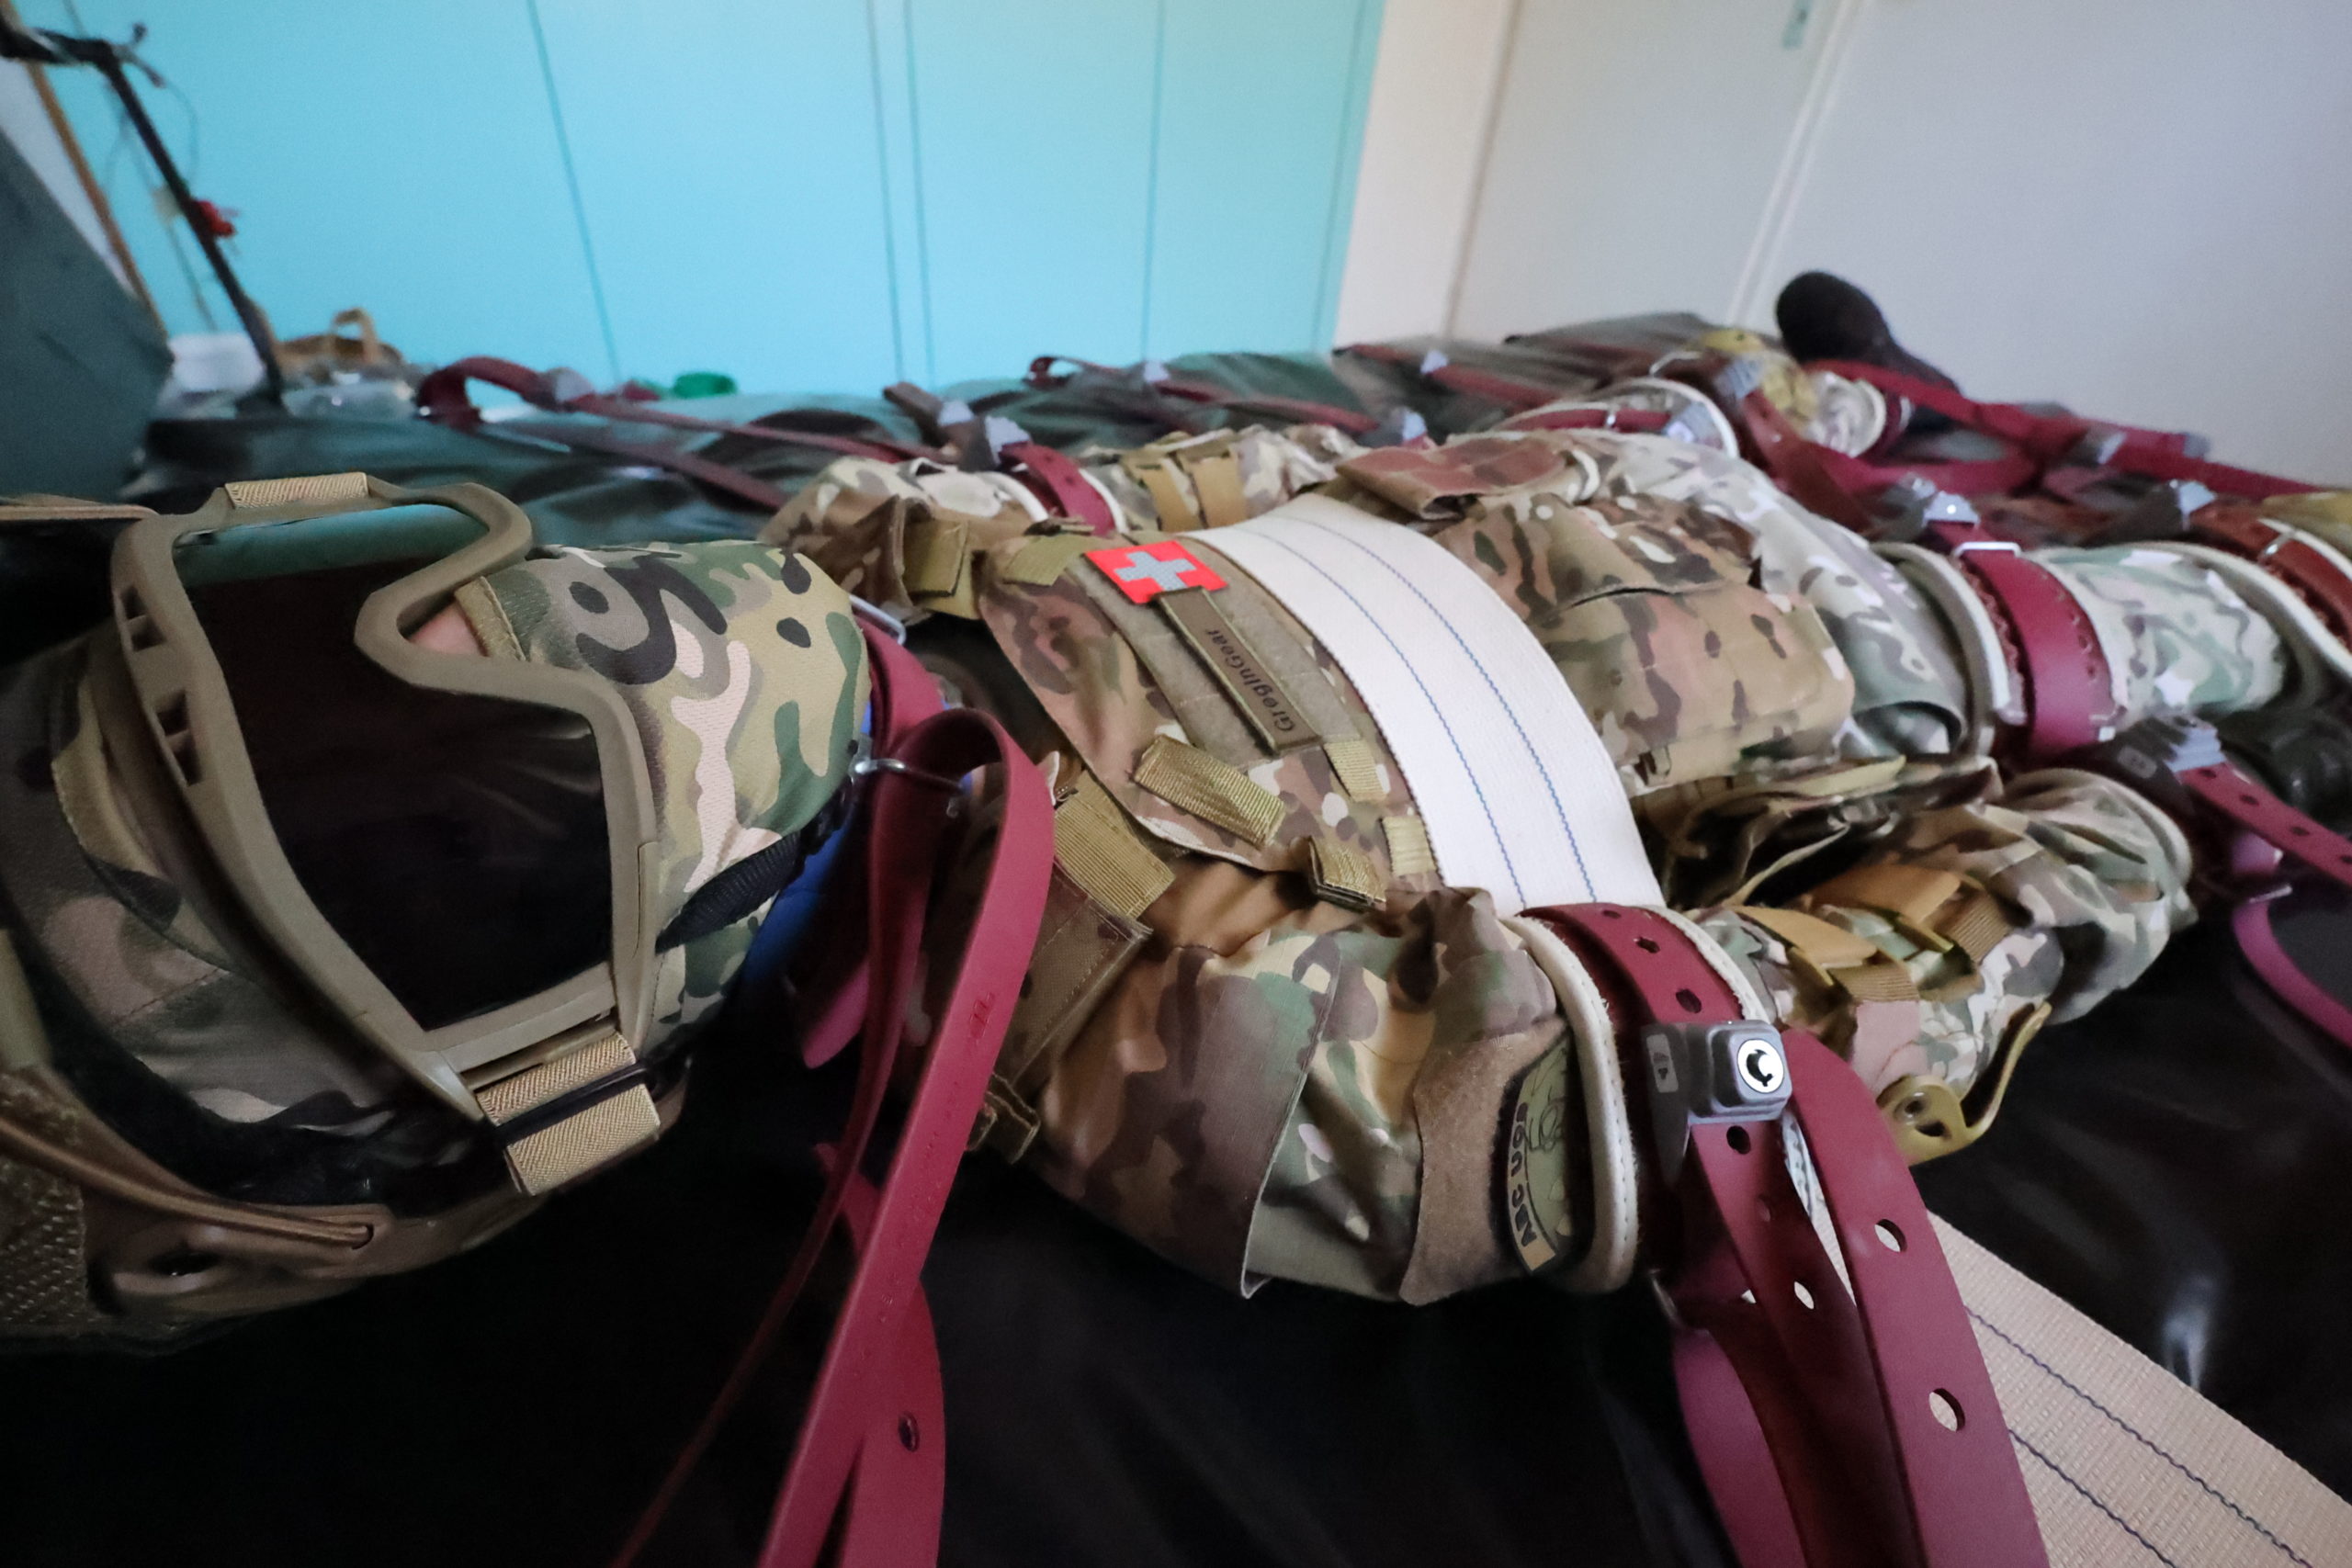
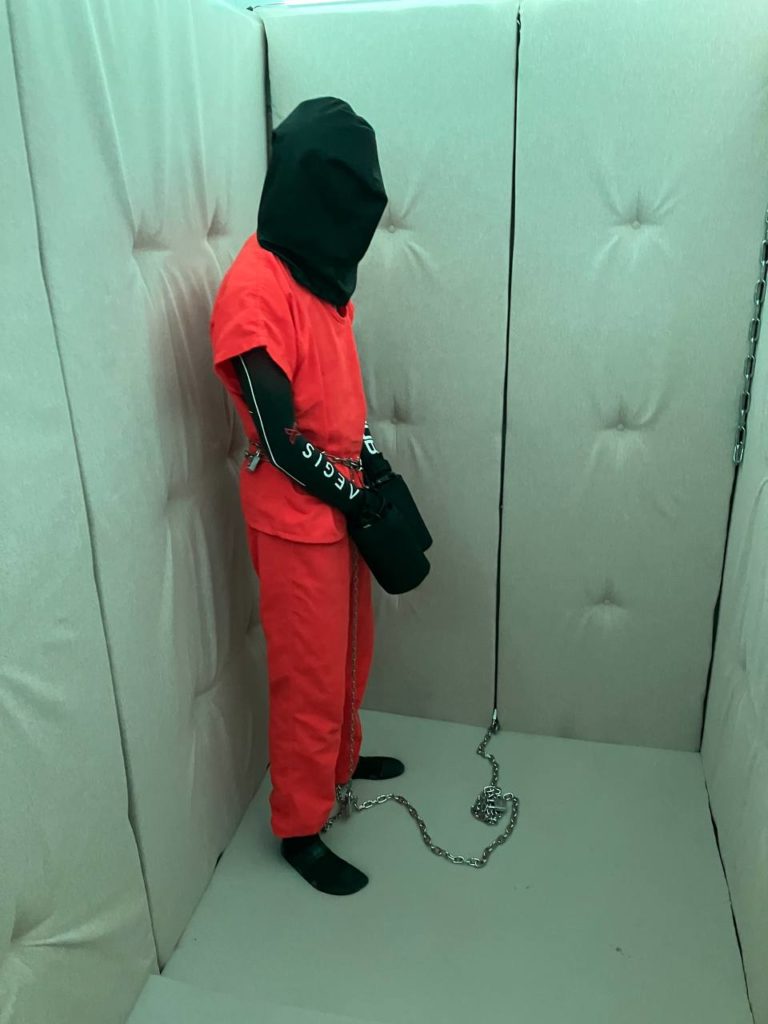
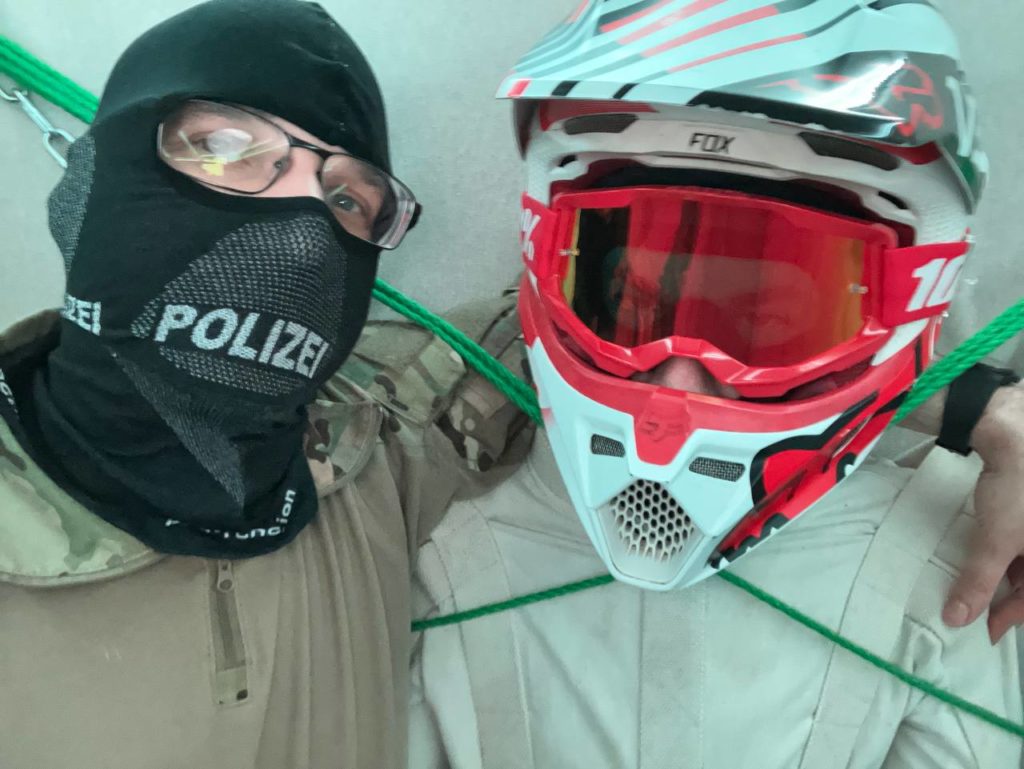
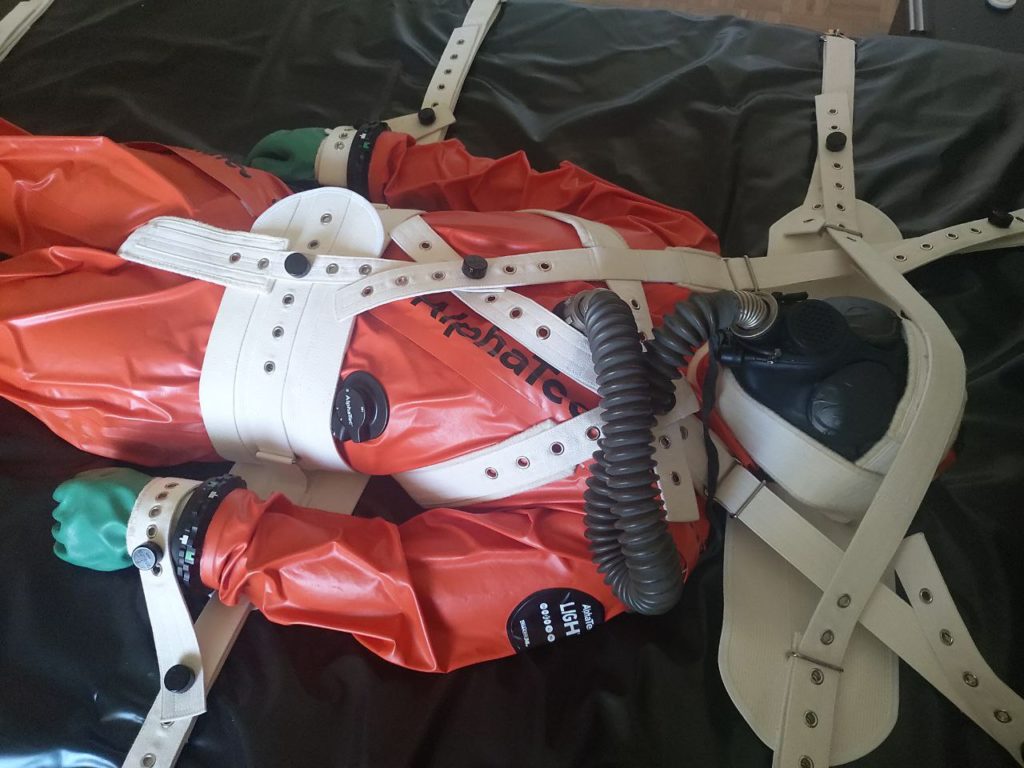
After more thant 35h in the game, second shower break, and I’m back in wetsuit + prison gear + handcuffs & tubes
2h30 chained in prison gear, sitting and waiting for nothing to happen
I’m left like that for 2h30, the hood was removed and I was just sitting, just looking at the wall
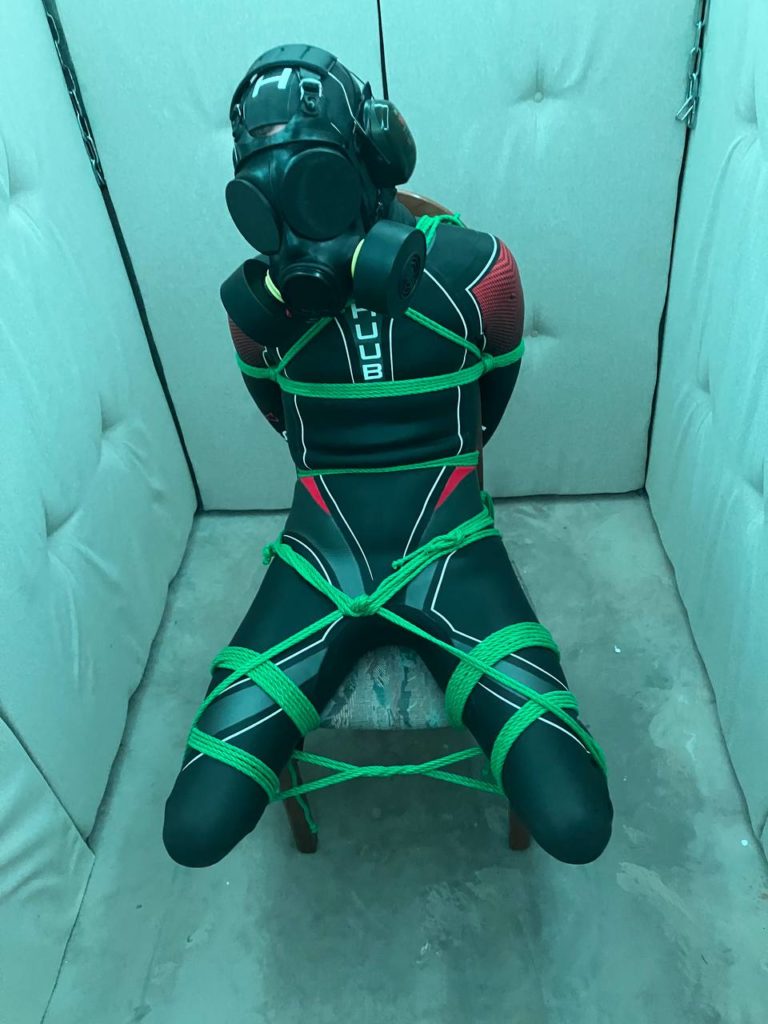
Later I was stripped of the prison gear and rope-tied to a chair for about 2 hours. I was edged on that chair for a while with a vibrator
2h on a chair and relentlessy edged with a vibrator…Video of me chained on the chair
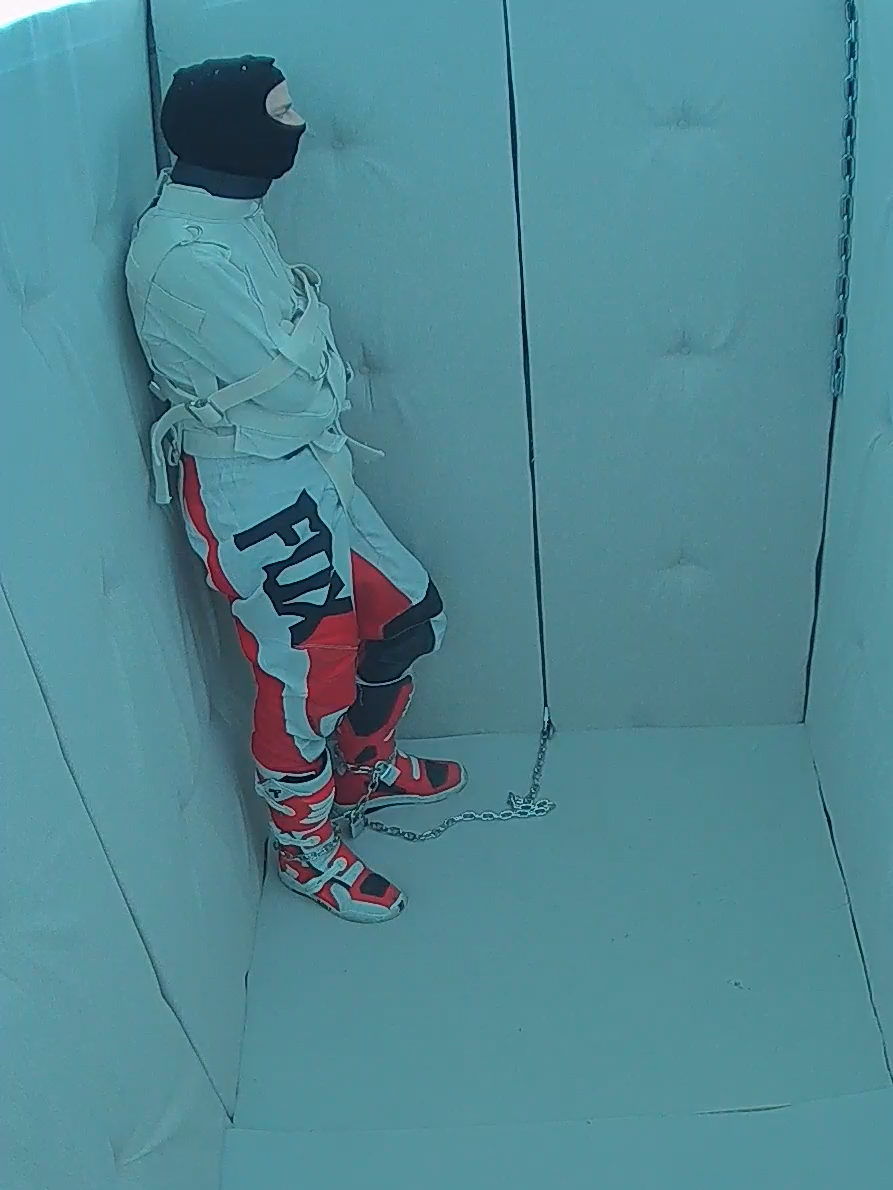
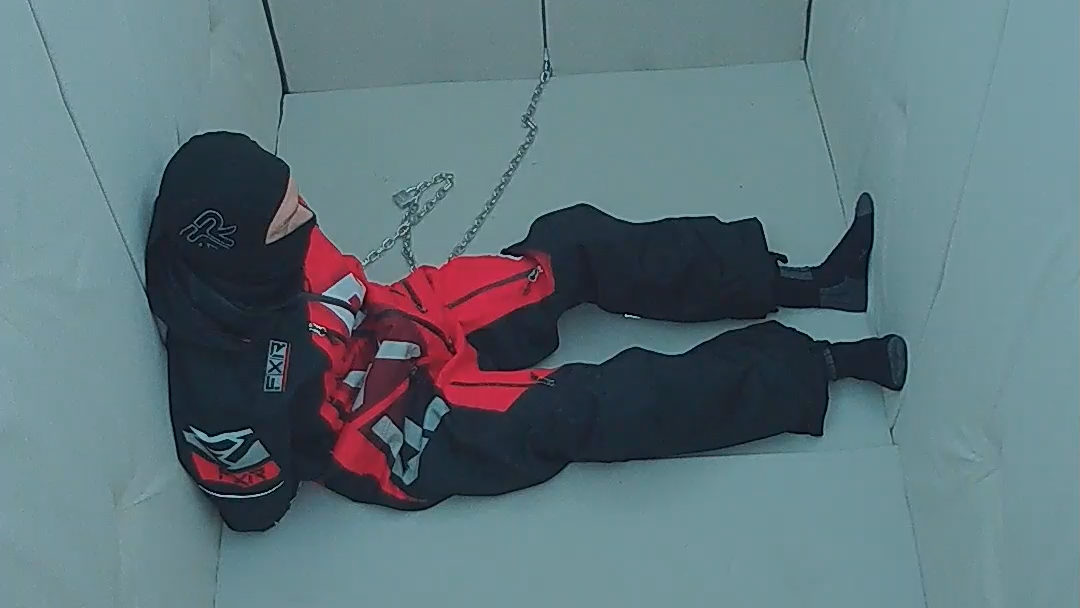
After that, I was put back into my FXR suit, handcuffed hands in the back and left to rot for about 2 hours. We were now 41 hours into the game. I was starting to feel really bored. There was I think the first switch. Erlier I could more or less sleep through boring times, now I couldnt sleep much anymore, just stare at the wall or ceiling for a long time in a perfectly quiet room… there was just me and my restraints…
Handcuffed in the back… always with a loose chain fixed to the wall
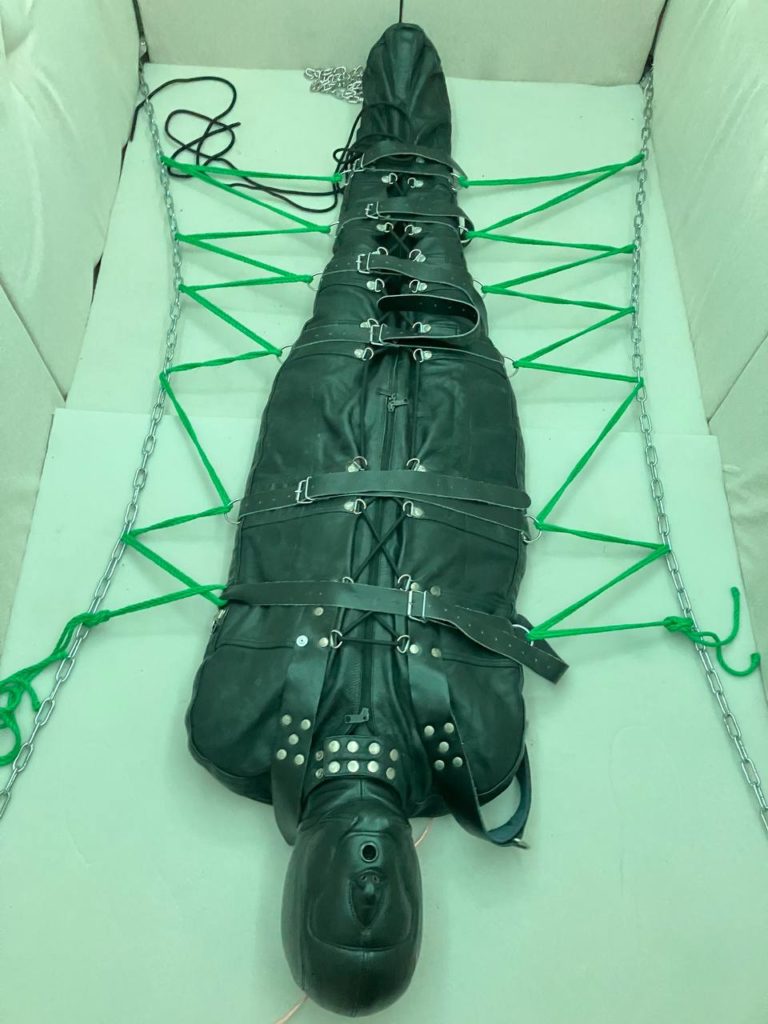
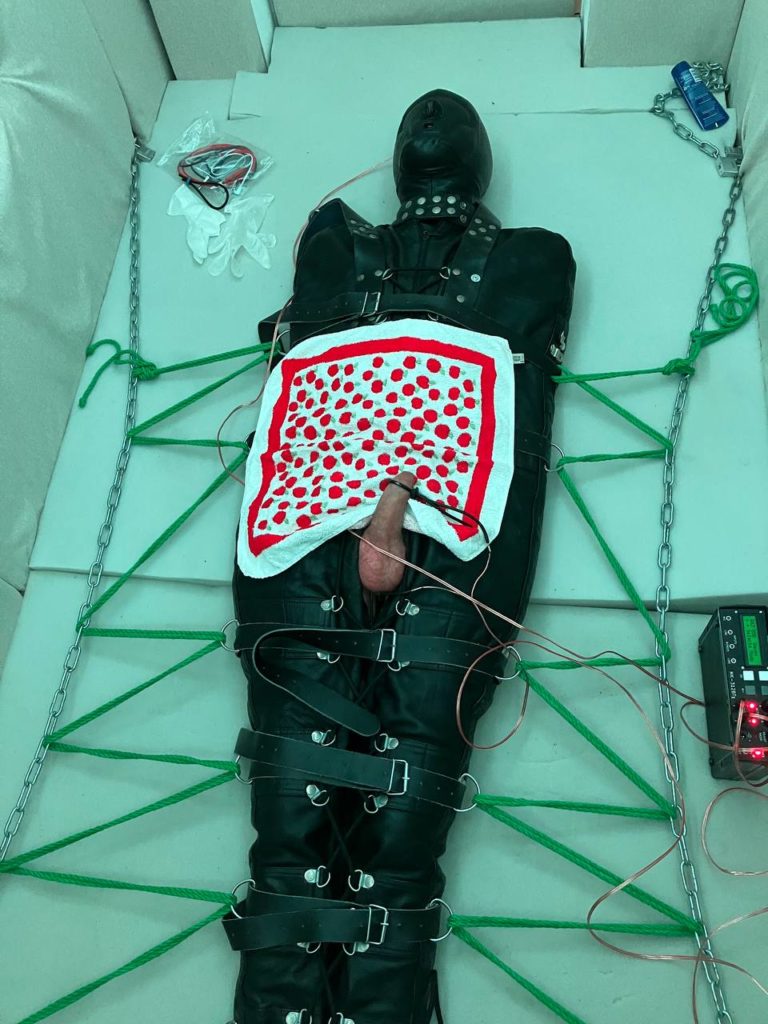
Later, about 7pm that day, I was put into my leather sleepsack and roped to the walls. Electro cock & ass was applied
After electro was finished, the leather hood was removed, I complained it was pressuring my head too much. Here I stood, forced to look at the ceiling lights, unable to sleep because of them. I was told there are 3 more hours before the symbolic 48h mark. That started a real mindfuck for me. I couldnt move, couldnt sleep, was forced to look at that ceiling and time was veery sloooowwww. At some point I really want to rip trough the sleepsack and escape it… without success….
We were now at the 48 hours mark. I was given a chance to stop the game if I wanted too… I asked to push some more. I was then put back in MX & straitjacket for the night.
Day 3
How does a good day start ? with more bondage ! after 12h left sleeping and dreaming, I was roped down to the floor, fed, and left to wiggle
The rest of the day was pretty uneventful, I was bored, empty minded. I had no willpower anymore, I was just waiting and accepting my fate…. That was a really really special mindset, I’ve never felt before… we were 58 hours into the play…
And after that, more than 63 hours, I was released ! Weather was beautiful ouside, I proceeded to kiss a tree and that’s it !
Huge thank you to my warden who went into all the efforts and the logistics to take over and keep an eye on me day and night !
And to wrap up this post, here are the words of Rotkaepple, how he approached the play and made it fitting for my experience
A few words from my warden
I heĺped Greg already while designing and building his cell. At some point, there was the need to properly celebrate this achievement. Greg put in so much effort and though into it. When he discussed the idea, that he wanted to be kept in this cell for a long term play, I was immediately game. After we needed to cancel the first attempt due to sickness, we found the Easter holidays to do the next try. This presented us with a long weekend. As it was not the first time for me doing this kind of a no-release play, I wanted to make it special for Greg. I knew him now for years, and we did already some long term stuff (e.g. he wanted to be kept 24hrs in in SJ), so I know him quite well. Long term like this is actually a lot of work, concepts, constant adaptions and logistics to take care of. How do you do the basic stuff like meals, shower, hygienic breaks. But also keep it interesting for both sides. It shouldn’t be a pure service after all. It should be fun for both sides. As Greg mentioned in his view, how he wanted to have it laid out, I made a rough concept for my own. As Greg already gave you a list of events, I don’t go into these details again. My concerns were more, to make it alternating between strict and loose bondage. Less movement and more movement. I think this is important for getting your body working and your circulation up and running again. So every strict bondage had also more comfort bondage paired with it. As I wanted that he’s able to endure it as long as possible, everything needed to be right. Meaning that I wanted to start lightly, build up the stress and then get it more and more boring towards the end. This is something completely different from short term play. Of course I can strap him in tightly into a SJ. This feels great for 2hrs, but can’t be endured longer. And if you’re in pain or muscle ache, there is nearly no way to really get rid of it completely without a full release. But this of course shouldn’t happen. So the bondage needs to be always of the right level. With the possibility of the long weekend, we have not been restricted for just a night or so. But I also didn’t want it end and then I just need to leave. Sub-drop is real. I wanted to plan for enough aftercare to compensate that. With that in mind I limited the duration from Thursday evening to Sunday evening as I will leave on Monday back to my place to give enough room to have him reach the now and then afterwards properly again. We agreed on a breakpoint at the 48hrs mark. Until then it will be no-release. After that it will be up to my decision for how long it will last (with the overall limit in mind). I think this curve was nicely described already by Greg above. I had my fun in working him towards this flipping point Greg mentioned earlier. My biggest concern was, that the bondage is too strict so that we need to cancel it due to real issues. Luckily this was not the case. The bondage although was not lenient, but still strict. Greg was never released, also for shower breaks always chained to the wall without the chance of escape. I was seeing the frustration and boredom building up. Not that I made in on purpose boring. I spread out the changes and actions somewhat evenly. But that saturation level was getting higher and higher. During the time in the sleepsack, I was foreseeing his flipping point coming. But of course seeing him “suffer” in such a way is still difficult. Because if there would have been the chance, he would have left there right a way. Once these 15min were through, I saw the acceptance of his situation. With that we could continue for the next day. I continued with his favorite bondage in MX and SJ and worked up for the release. I prepared a treat with a proper dinner afterwards. His happiness proved it right to continue and let him experience the acceptance of his situation and not let him out. A no-release play means no release in between.
This is only working when a very deep level of trust is achieved. The sub needs to feel this trust. Because they need to trust the top to make the right call. If they need out, they need out. But if not, it is up to the top to decide how to handle it. A wish is not always granted. But this must not be overruled, when it is a real reason. If this trust is not there, this flipping point will never been reached, it needs to be called of. And yes, this is a lot of work. Constant monitoring, staying alert of any changes in the sub, sleeping while still monitoring, doing stuff, which you always could stop or interrupt as you need to tend to the sub, feeding yourself and the sub, and a lot of more things. Was it worth it? Yes absolutely. I’m very proud that I was allowed this, that we together achieved something very rare, that I was part of building and celebrating his cell. And I’m very happy, that I have generated a very happy sub after this weekend.
Since I had the opportunity and honor to visit Yohan555’s place and try out his cells, I had this growing idea of wanting to build one in my home. One day in spring 2025, I woke up inside of Yohan’s padded cell and told myself “no, really, I need to build one”.
Caution and planning
I knew in advance how big of a project it would be, I worked on it mostly alone for weeks. It was complex, intense and draining, but I had intense motivation to keep doing it !
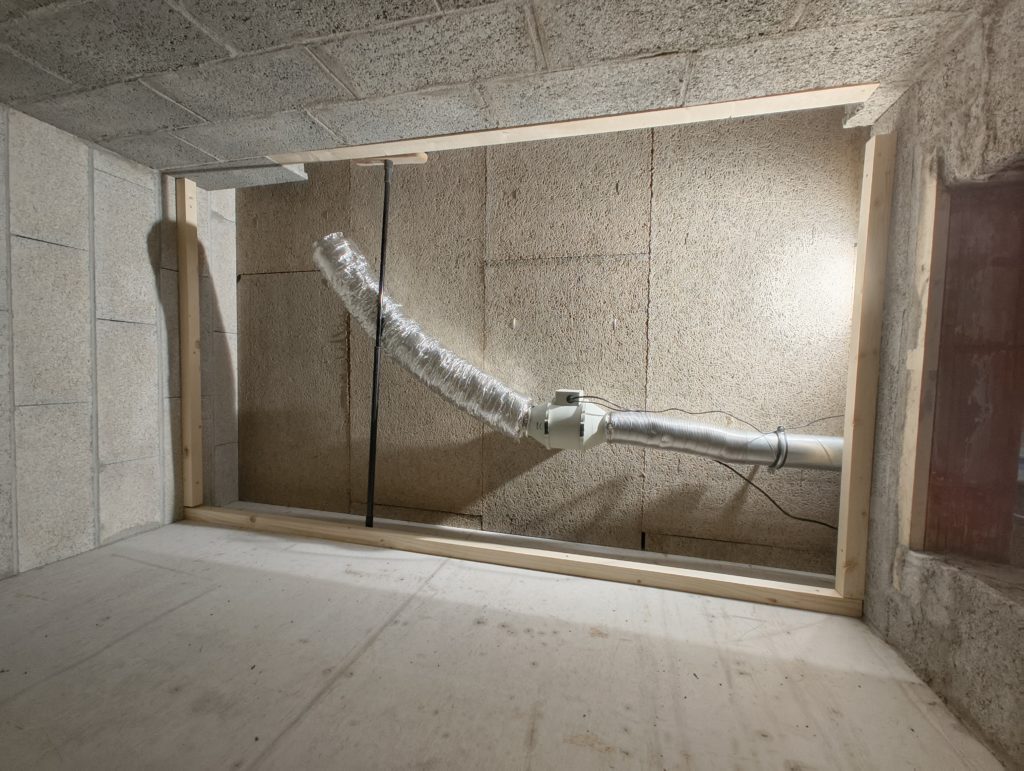
I was very inspired by Yohan555’s designs and I took what I thought were good ideas into my design : the light placement on top with indirect light, the false ceiling, the ventilation,…
Then in the summer 2025 I took a drawing software and started drawing plans for my cell. I will need to build a new wall into my basement, a job which I have never done before, and I had no clues about how to do it. When I was confident enough, I ordered raw materials.
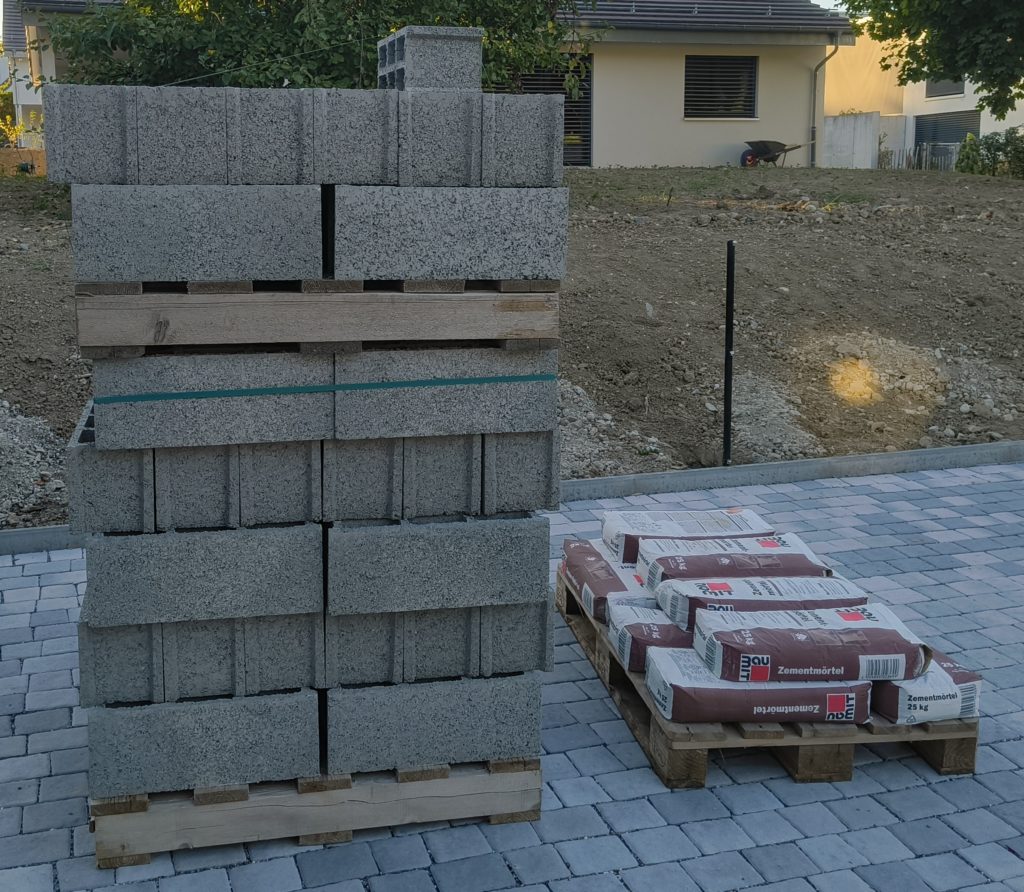
Heavy materials
To build this new wall, I ordered about 80 concrete blocks, 10 bags of mortar, it’s 1’800 kg of raw materials !
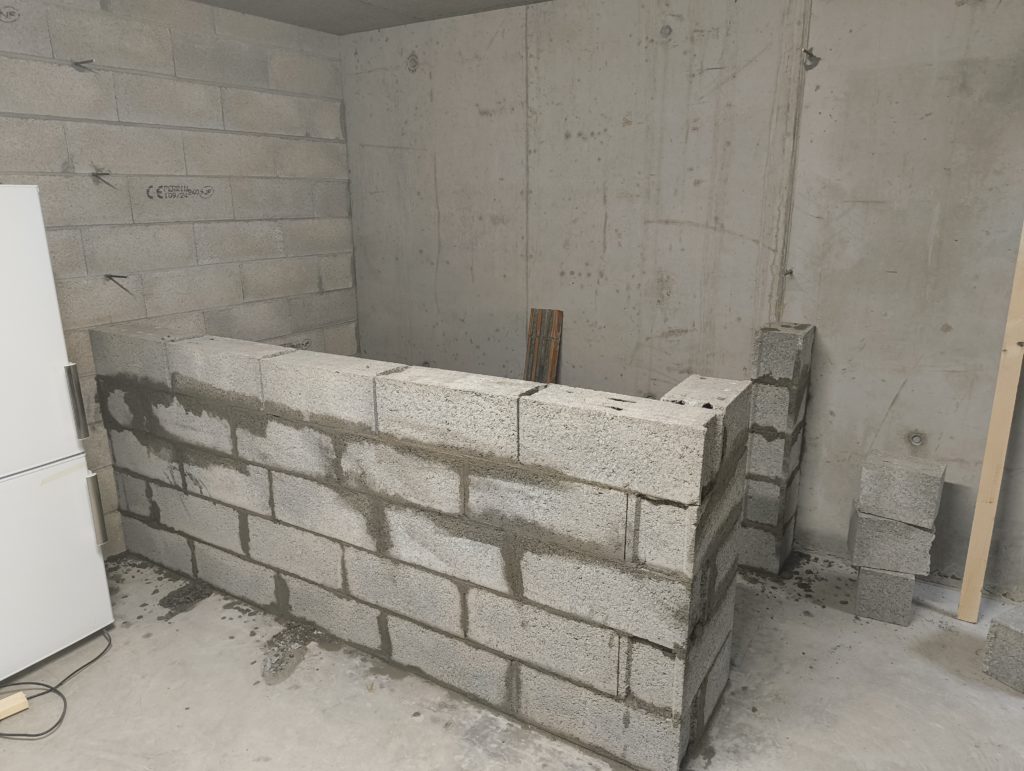
I then proceed to build my wall in the basement. I anchored pieces of rebar in the wall to bond my new wall with existing walls.
Half way trough the masonryheavy masonry finished
When my masonry comes to an end, I got my safety door delivered and I start building the false ceiling frame.
Installation of the door
Inside works
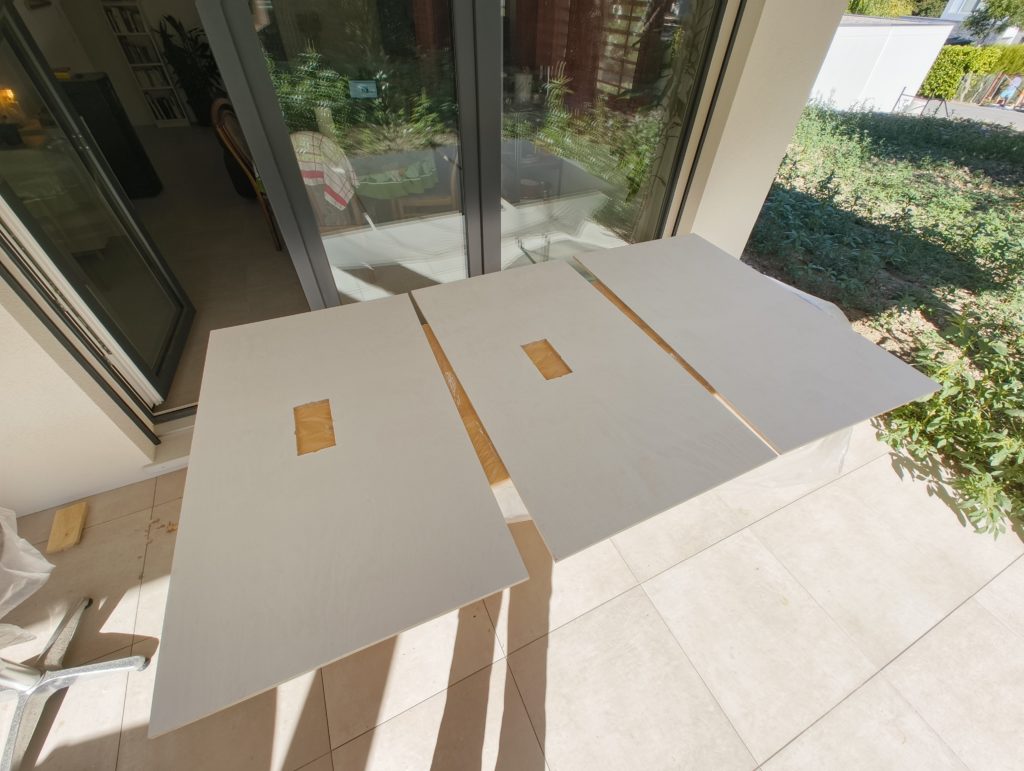
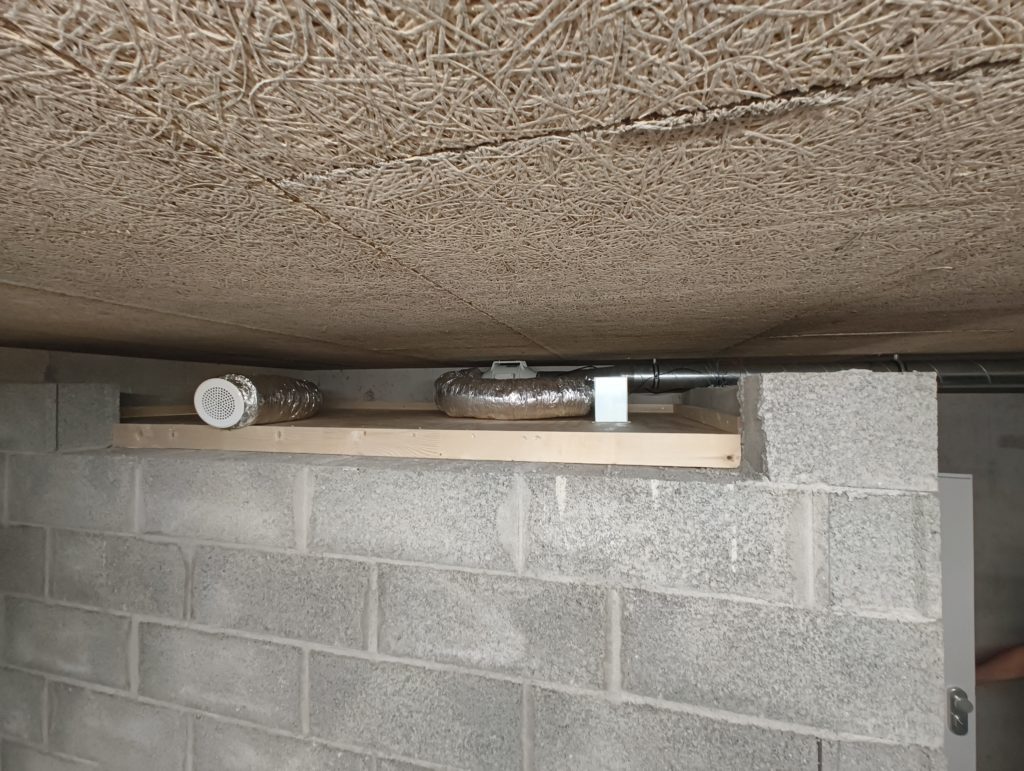
Frame to hold the false ceiling and variable speed fan installed on the ceilingCutting and painting panels for the false ceiling
When the panels were cut, I was helped to screw them in place
For the ventilation I use a variable speed fan that gets air next to an outside window. The air is then pushed trough a sound absorbing duct into the air vent. I carefully selected an air vent and a fan that can push a LOT of air if needed, for example if it gets too warm in the cell. In practise, you need just a very small breeze, so my fan will run like 20% and be very silent.
I put also sound absorbing duct on the exhaust port, so the sound is not going from outside to inside.
Lights
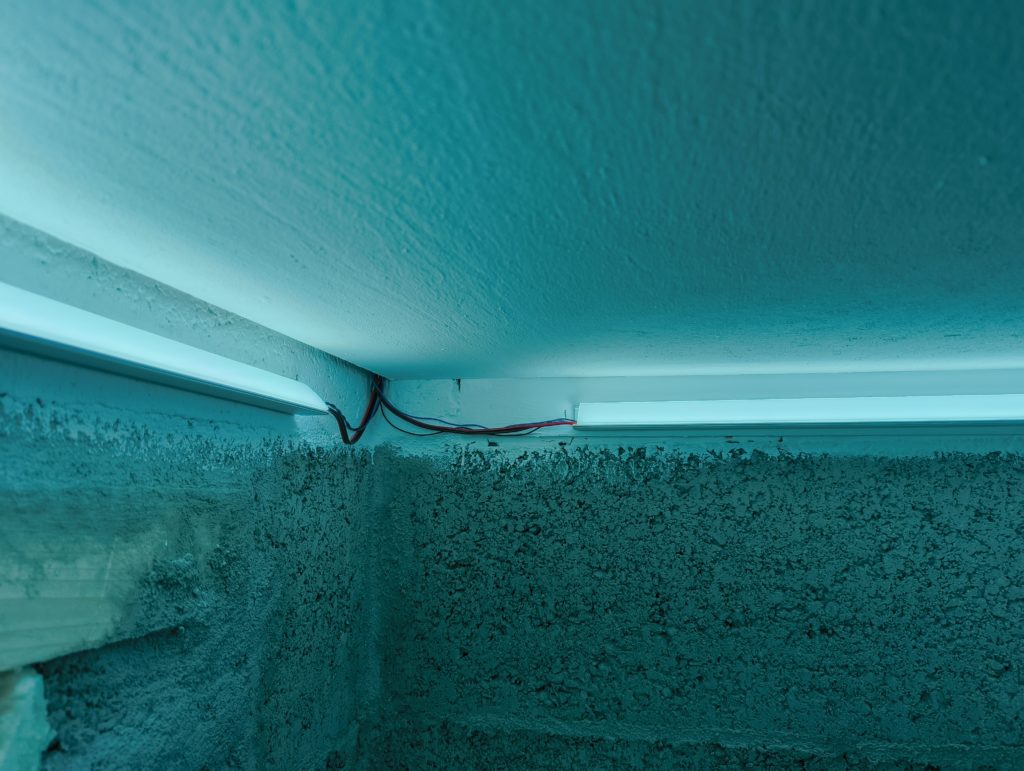
For the lights I bought two 3 meters led strips from china. The srips I chose use 24V power, have 720 leds/m and use the chip WS2811 to control segments after segments independantly.
I used an ESP32 microcontroller that I had lying around with the firmware WLED to control the lights over wifi and into my domotic software.
The leds are then embedded into aluminium rails.
First tests of the lightsLeds embedded in aluminium rails
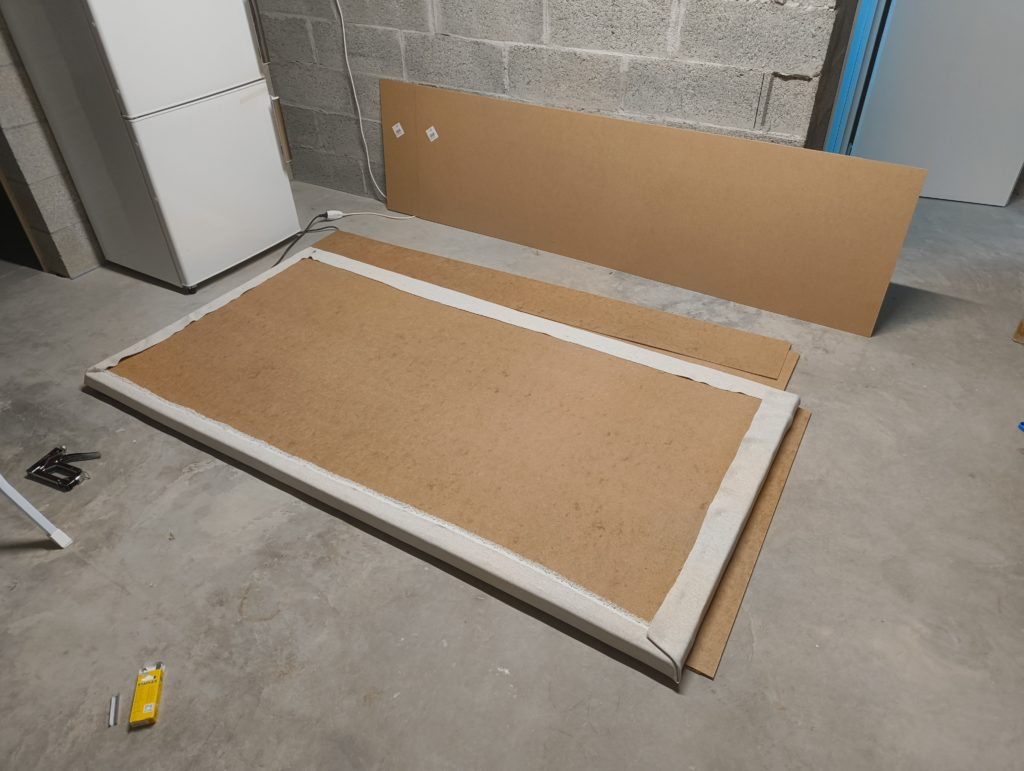
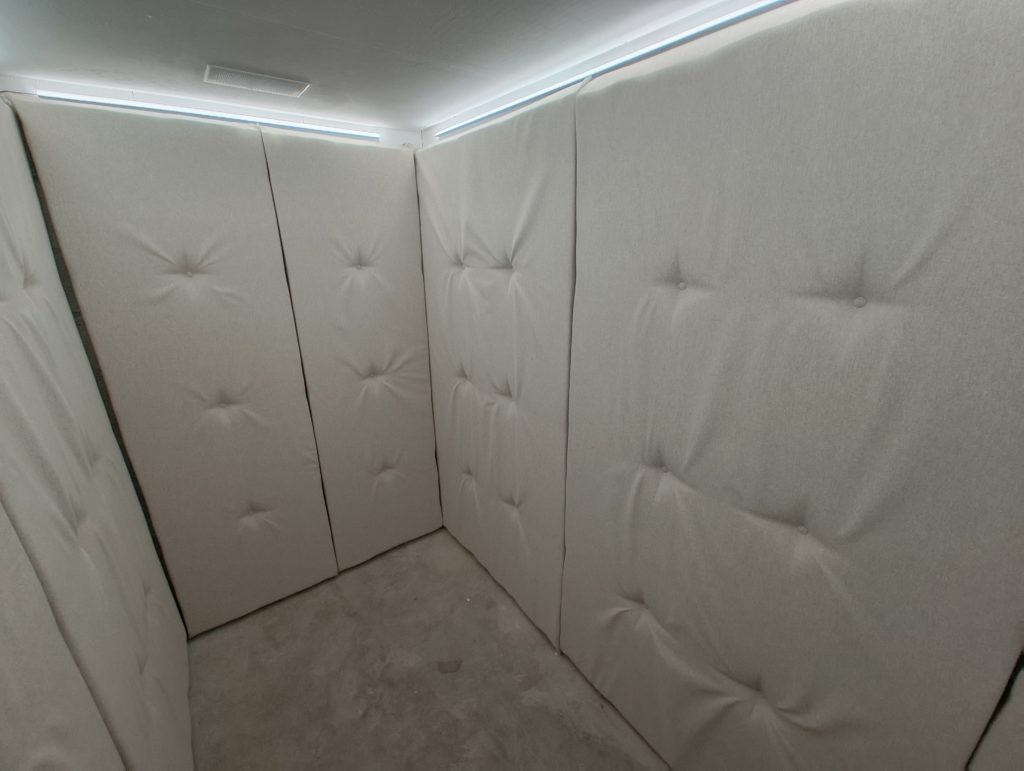
Padding
It would never be a padded cell if there was no padding ! So, how do we do that ? Well, nothing more easy : get some foam, wooden backplane, any type of covering or fabric and staple it on the padding !
I did a small prototype to have a feel for it, then liked it and proceeded.
40×80 cm padding element to see how it goes
I ordered piles of 5cm thick foam, 15m of fabric with a design that I like and big panels of wood. The wood is thin, it doesnt need to be strong, it just needs to hold the foam and fabric in place.
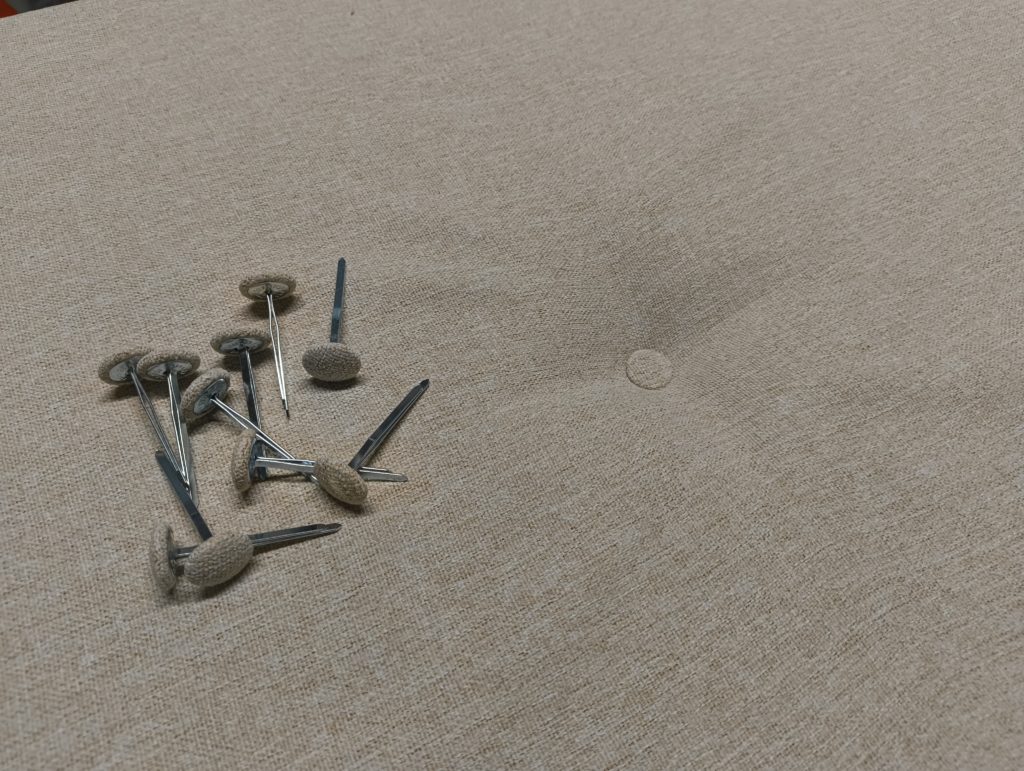
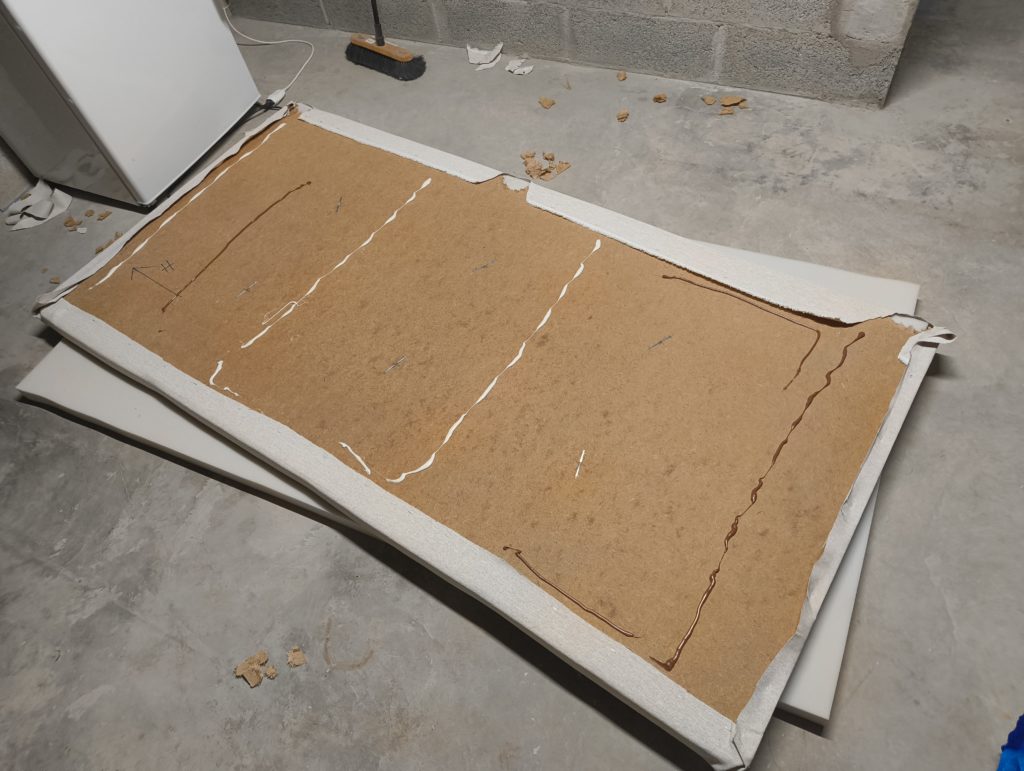
Big padding panel in the makingButtons being installed on the panelsA finished panel
The panels are then simply glued to the wall !
Panel ready to glue on the wall
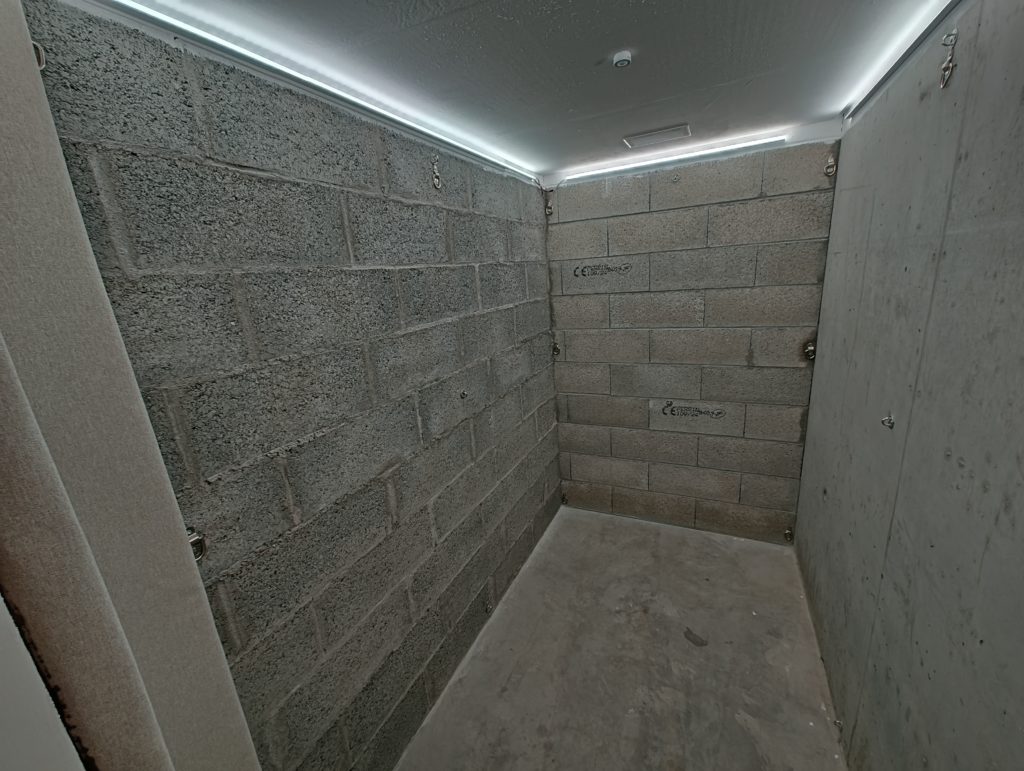
Oh wait wait wait ! Before gluing the panels, let’s add anchor points inside the cell !!
Anchor points placed in strategic places for later usePanels are dry tested in place and later glued
Webcam & remote monitoring
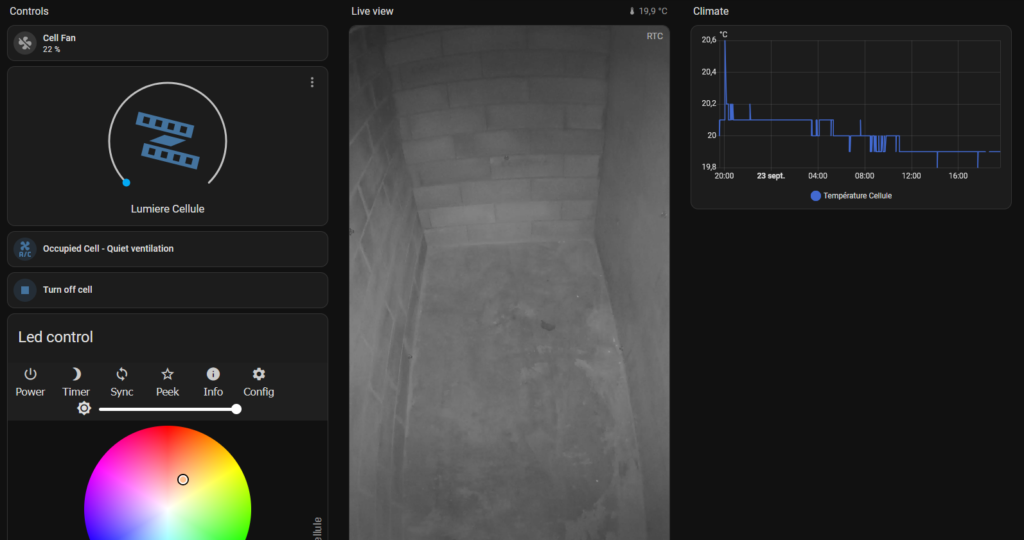
I installed a webcam, a microphone, a temperature sensor, then everything goes onto my Home Assistant dashboard.
Webcam on top of the doorHome assistant dashboard to control the cell
On the dashboard I can control the light, the fan, view the video with sound, add evil strobe effects on the lights,…
Cell cost breakdown
It is not a cheap project I must admit, the total is several thousand euros. But it will last for years.
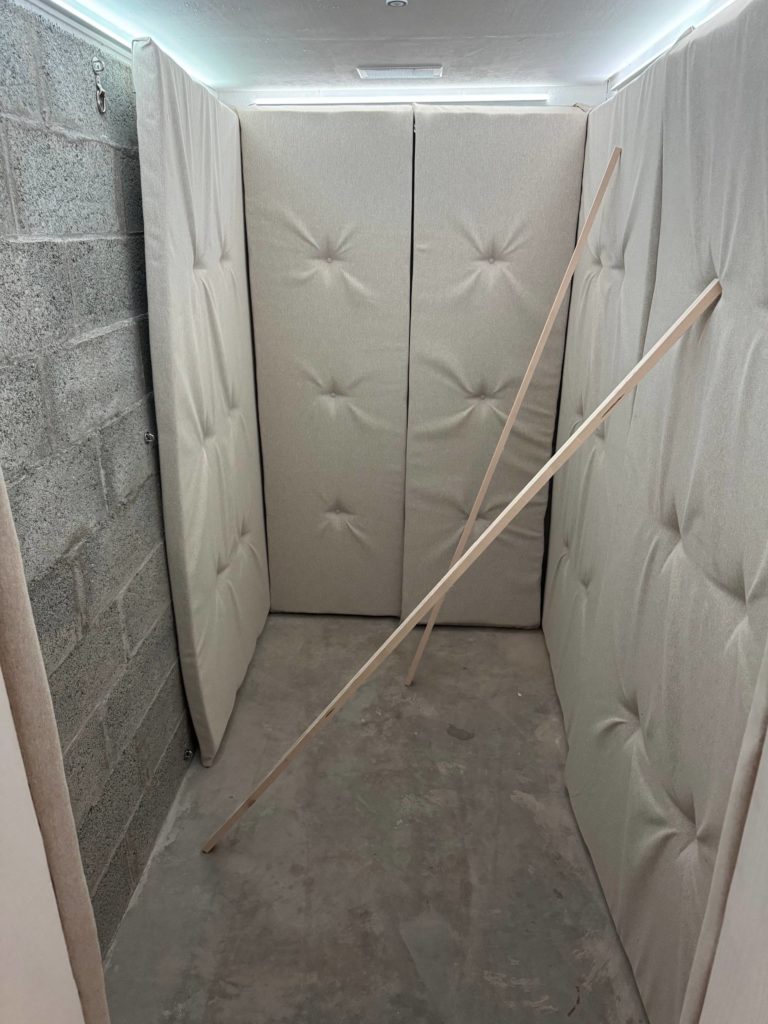
The finished cell
And here it is (almost) finished ! As of writing, I need still do build padded panels for the floor. This did not stop me from doing intense testing of the cell over a week-end 🙂
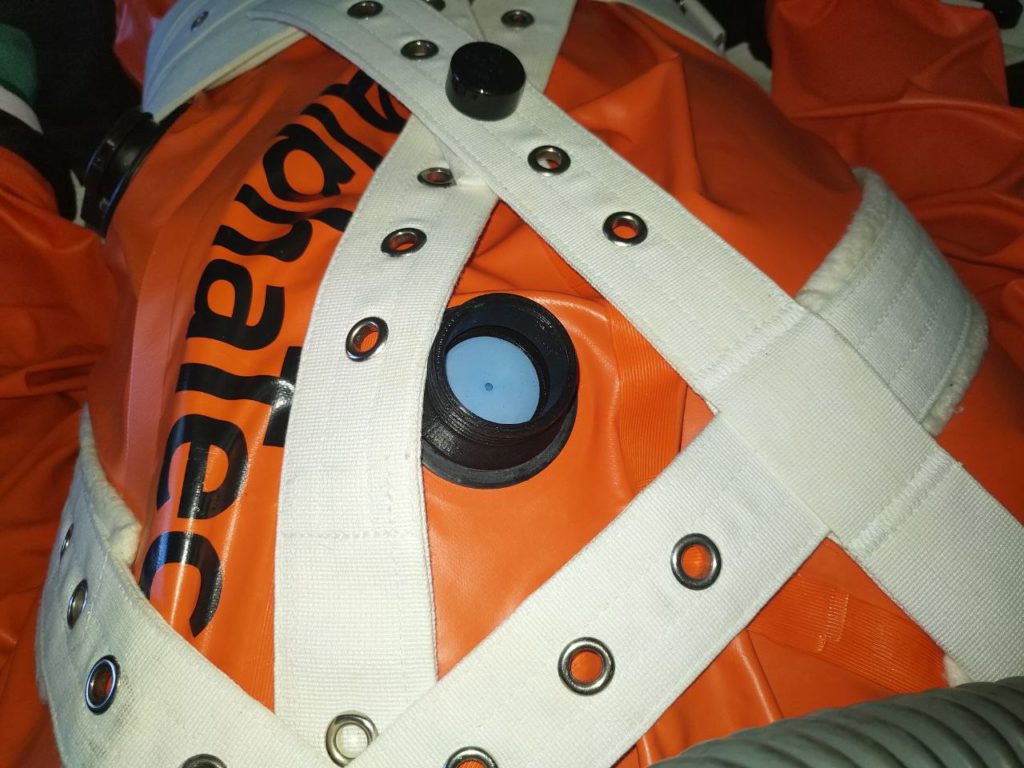
In 2020-2021 I designed an adapter to connect a gasmask tube onto a Trellchem/Alphatec suit. I have made several designs and the latest one is presented here. The adapter screws in the existing vent hole of the suit. It uses a checkvalve and an o-ring so that when you unscrew the gasmask tube the vaccuum effects lasts a bit more.
Downloads below at the end of this post.
You will need to print the adapter part and the nut part. Then you will need a 30mm o-ring with 1.5mm diameter and a “3M 383 valve” both you can easily find online.
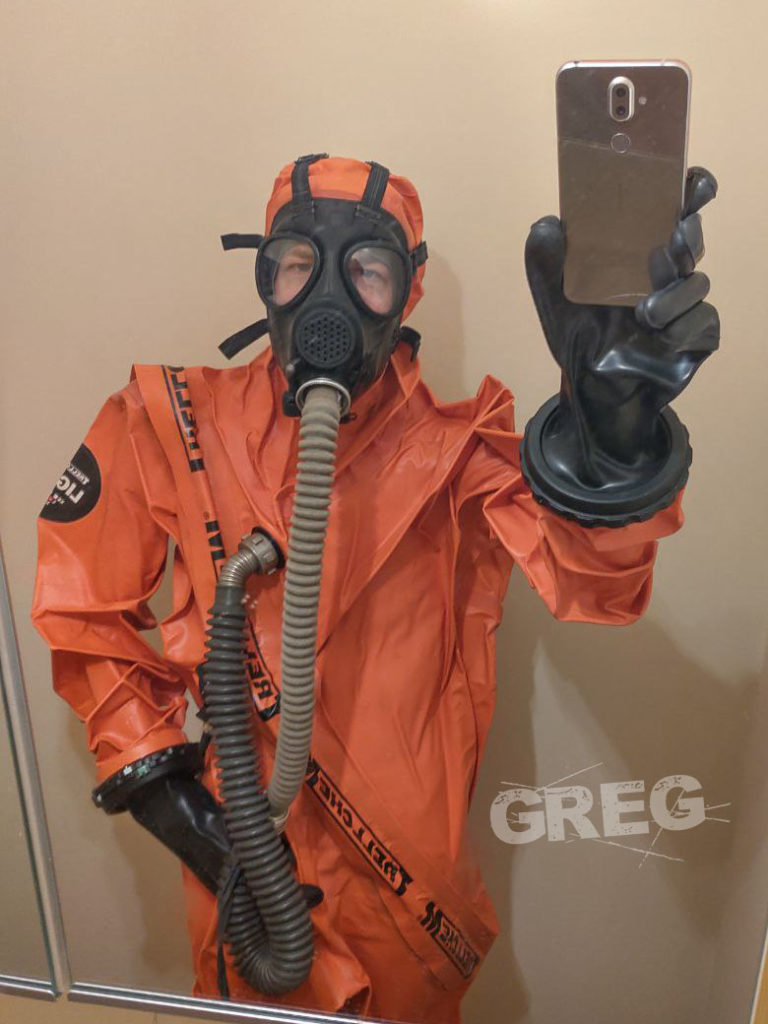
Example of the valve after vaccuuming on a test subject.Example of the valve during use on a test subject. Restraints help ensure the test subject does not remove the tube at any time.
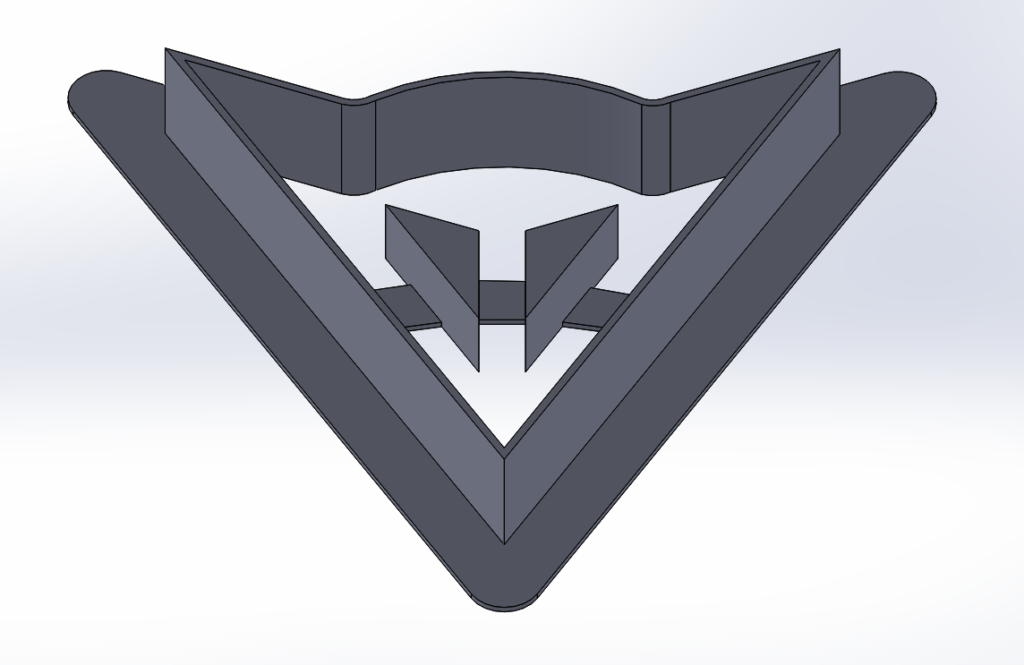
I had the sudden idea of making myself gear related cookie cutters after Gearblast. It was probably a way to fight for the Post-Gearblast Depression Syndrome (PGSD). It is actually really simple, I opened up Solidworks, loaded a logo picture I wanted to represent and followed the shape to give it a 3D life.
Then I printed these shapes on my 3D printer and it was soon time to cut little pieces of biscuits !
Et voià, bon appétit !
For those who want to make little Gearblast cookies and little Dainese cookies, here is the download link for the STL files :
It is very interesting to feel an airtight suit or a drysuit close to the body with a vaccuum effect. Some people use a vaccuum cleaner but what I find fun is to use a tube connected to the air intake of a gasmask. While your breathe wearing the suit, you gradually pump the air inside naturally.
To be able to connect to the Trellchem a standard gasmask tube, I need an adapter. By standard I mean a tube with connectors following the STANAG 4155 standard (also called 40mm NATO Thread). The trellchem has an air exhaust port that is fastened into a 25mm hole. I designed an adapter to replace it.
Trellchem exhaust port with washer and nut.
Version 1
My design in SolidWorksMy tube adapter vs the original exhaust port.
Version 2
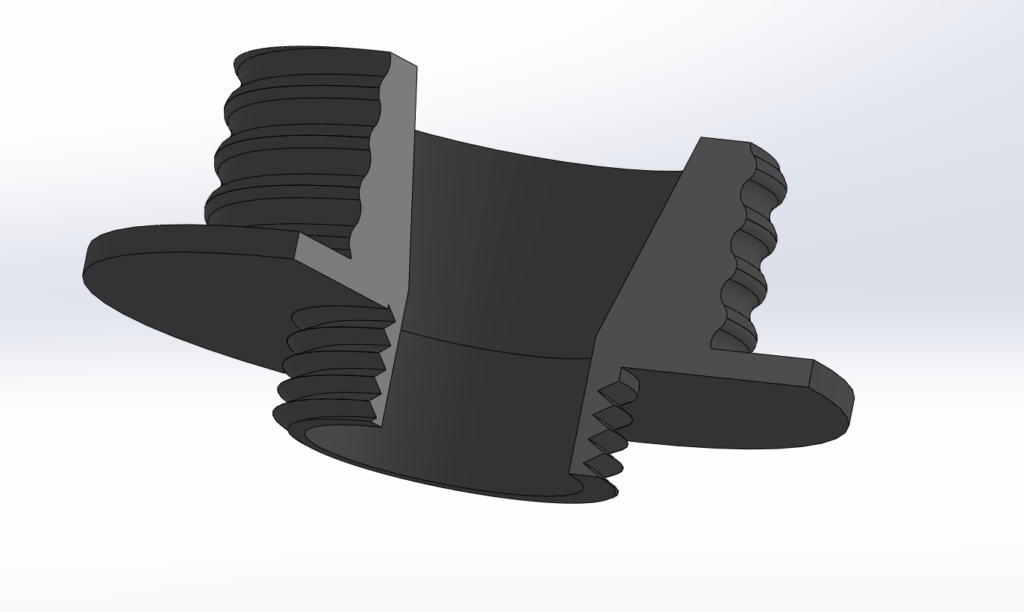
This adapter worked fine, but eventually when I disconnect the tube, all the air comes back in the suit at once. I designed a second adapter with a checkvalve so that the suits stays airtight.
New design using a 30mm rubber disc as checkvalveNew valve ready to 3D print viewed in a slicer softwareAir is kept inside while the tube is disconnected from the suit
I dreamed for years to own a chemical protection suit. I remember I did try one in 2012, a level A suit by Auer.
Auer Level A full encapsulation suit (2012)
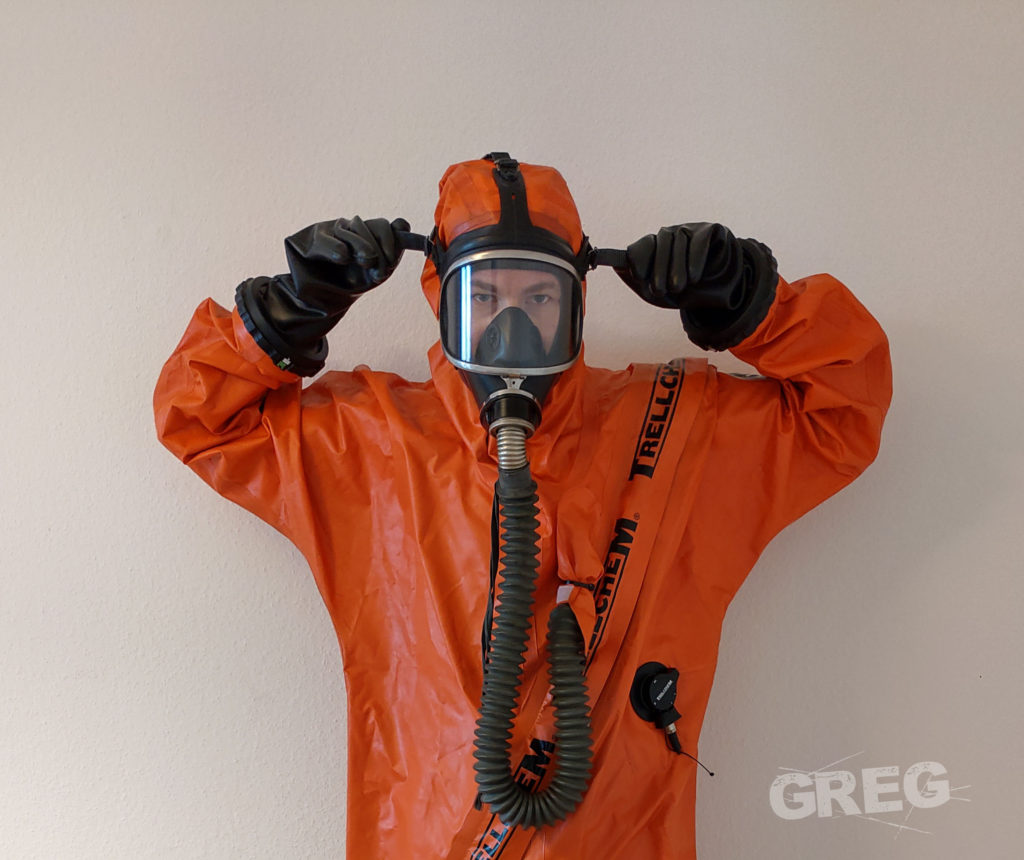
At different occasions in 2019, I played with people wearing Trellchem suits. I was not wearing them myself but damn I enjoyed touching and smelling them ! So I decided I needed to get one…
Trellchem suits
Sourcing a Trellchem suit is not that easy. It’s a very narrowly used product. Don’t expect to find new ones in a store somewhere or listed online for sale.
Ansell bought Trelleborg, the former manufacturer of Trellchem in May 2012 (source : ansell annual report 2013). In October 2018, they communicated that Trellchem products will now be called AlphaTec Products. This made it hard for my reseach because some websites are not updated and resellers are hard to find wih the name AlphaTec (AlphaTec is a leading glove manufacturing brand of Ansell)
I found a way to source used suits. A friend of mine pointed me a seller from India on Ebay selling used suits. I was careful and closely inspected pics from the seller to pick one in good condition. I found one almost new and in a good state.
Gear delivery
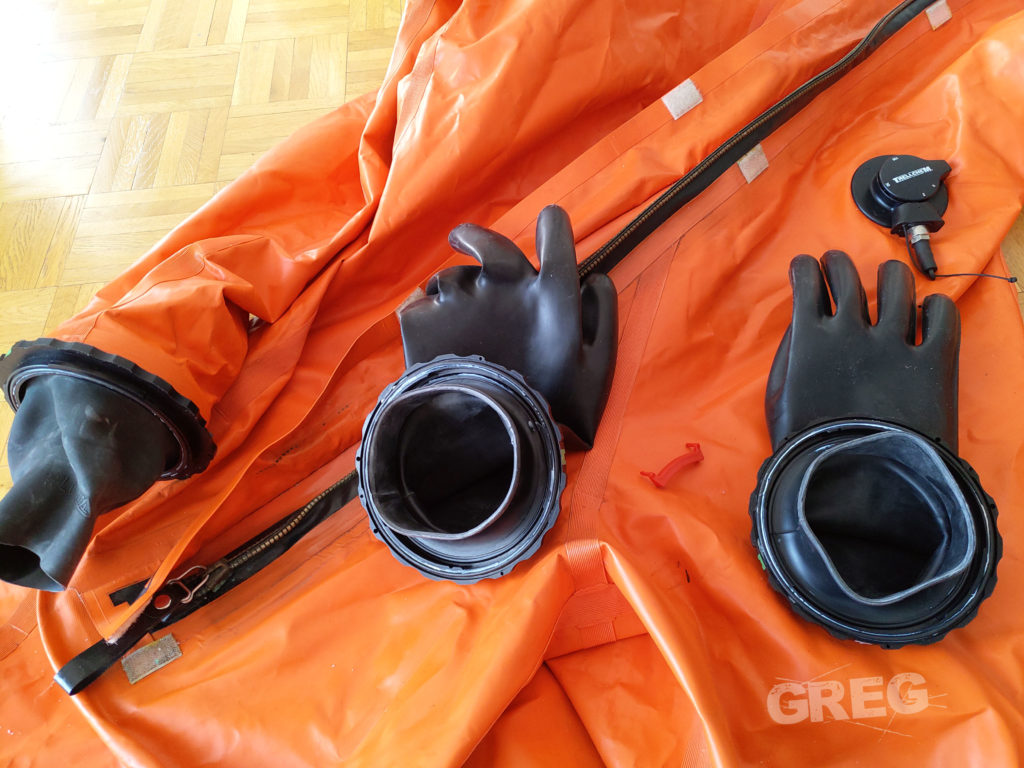
As soon as I received my suit, I put it on…
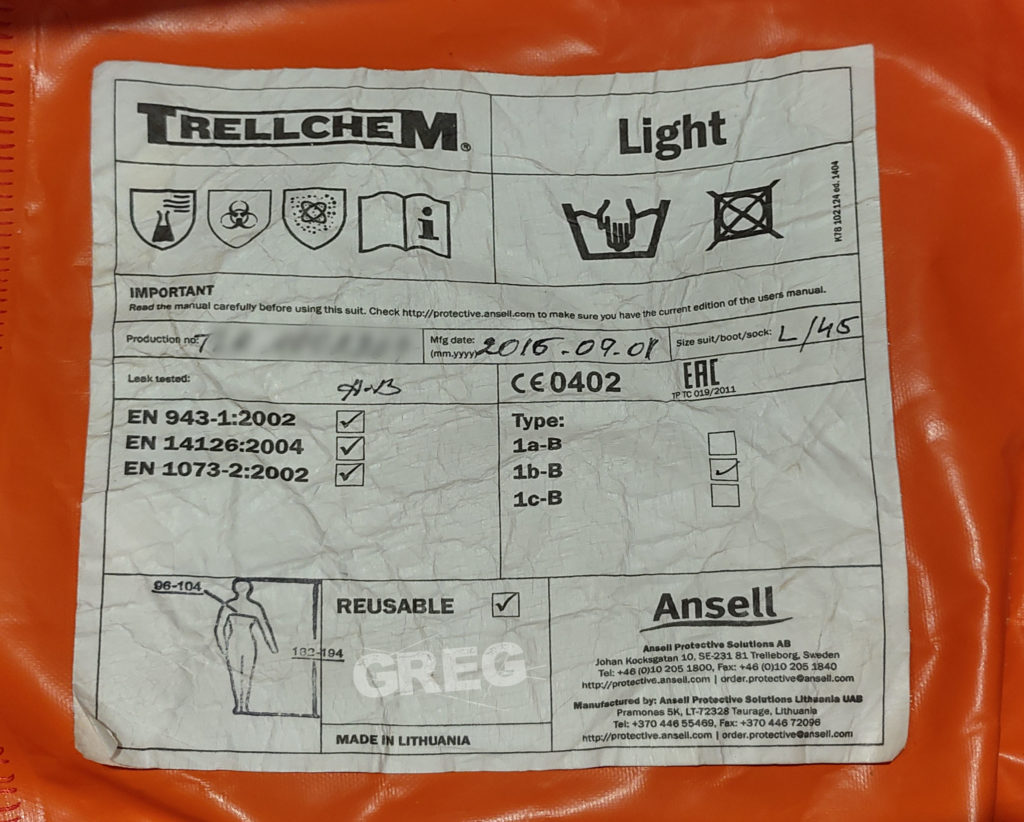
Gear up and breathe inside the suit 😉Suit is in a good state, glove joints are greased, gloves are powderedBoots are CLEANManufacturing date is 2016, this is quite recent for a used productThe suit in full